Getting started with BeeltleboxCI and Vitis: Running FAST
This is a tutorial designed to show how to get started using BeetleboxCI and Vitis, in which we will cover the following:
- Design - First we will set up a Vitis Vision project and make an accelerated Fast Adaptive Sequencing Technique (FAST) kernel
- Simulate - Second we will simulate this in Vitis by setting up a test bench
- BeetleboxCI Integratation - Then we will integrate our project and testbench with Beetlebox CI
- Review - To finish we will compare the simulation results
The tutorial is designed not to be board specific. The accompanying git repository for this tutorial may be found here.
Tested Environment
- OS: Ubuntu 18.04
- Vivado version: Vitis 2020.1
- FPGA used: Zynq Ultrascale+ series ZCU104
Installation Guide:
- A Github is required to use BeetleboxCI.
- Vitis (SW Developer) from Xilinx's website, which may be found here.
- A BeetleboxCI account. Access may be requested from here.
Design
- Create a directory called workspace in the Vitis folder and change it to be the current working directory. Then we may launch Vitis. The following script assumes that Vitis was installed in the default directory. If it was not, then use the correct installation directory.
# Make workspace
cd /tools/Xilinx/Vitis/2020.1
mkdir workspace
cd /tools/Xilinx/Vitis/2020.1/workspace
source /tools/Xilinx/Vitis/2020.1/settings64.sh
vitis
Download the following from Xilinx Vitis Embedded 2020.1 downloads, which may be found here.
ZCU104 Base 2020.1 and extract this to the Vitis platform folder.
Next the ZYNQMP common image, extract this to the workspace folder, then enter the folder and open up a terminal and run the following ./sdk.sh. Extract to the following directory /tools/Xilinx/Vitis/2020.1/workspace/ now open a file browser in that location and copy the aarch64-xilinx-linux folder to the workspace folder
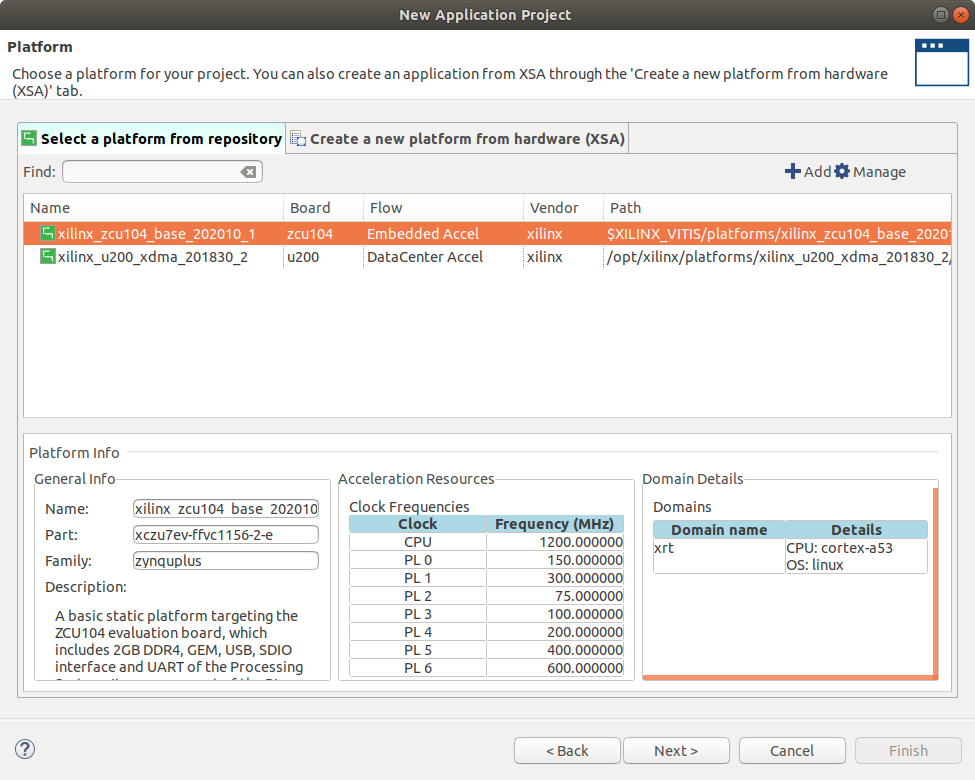
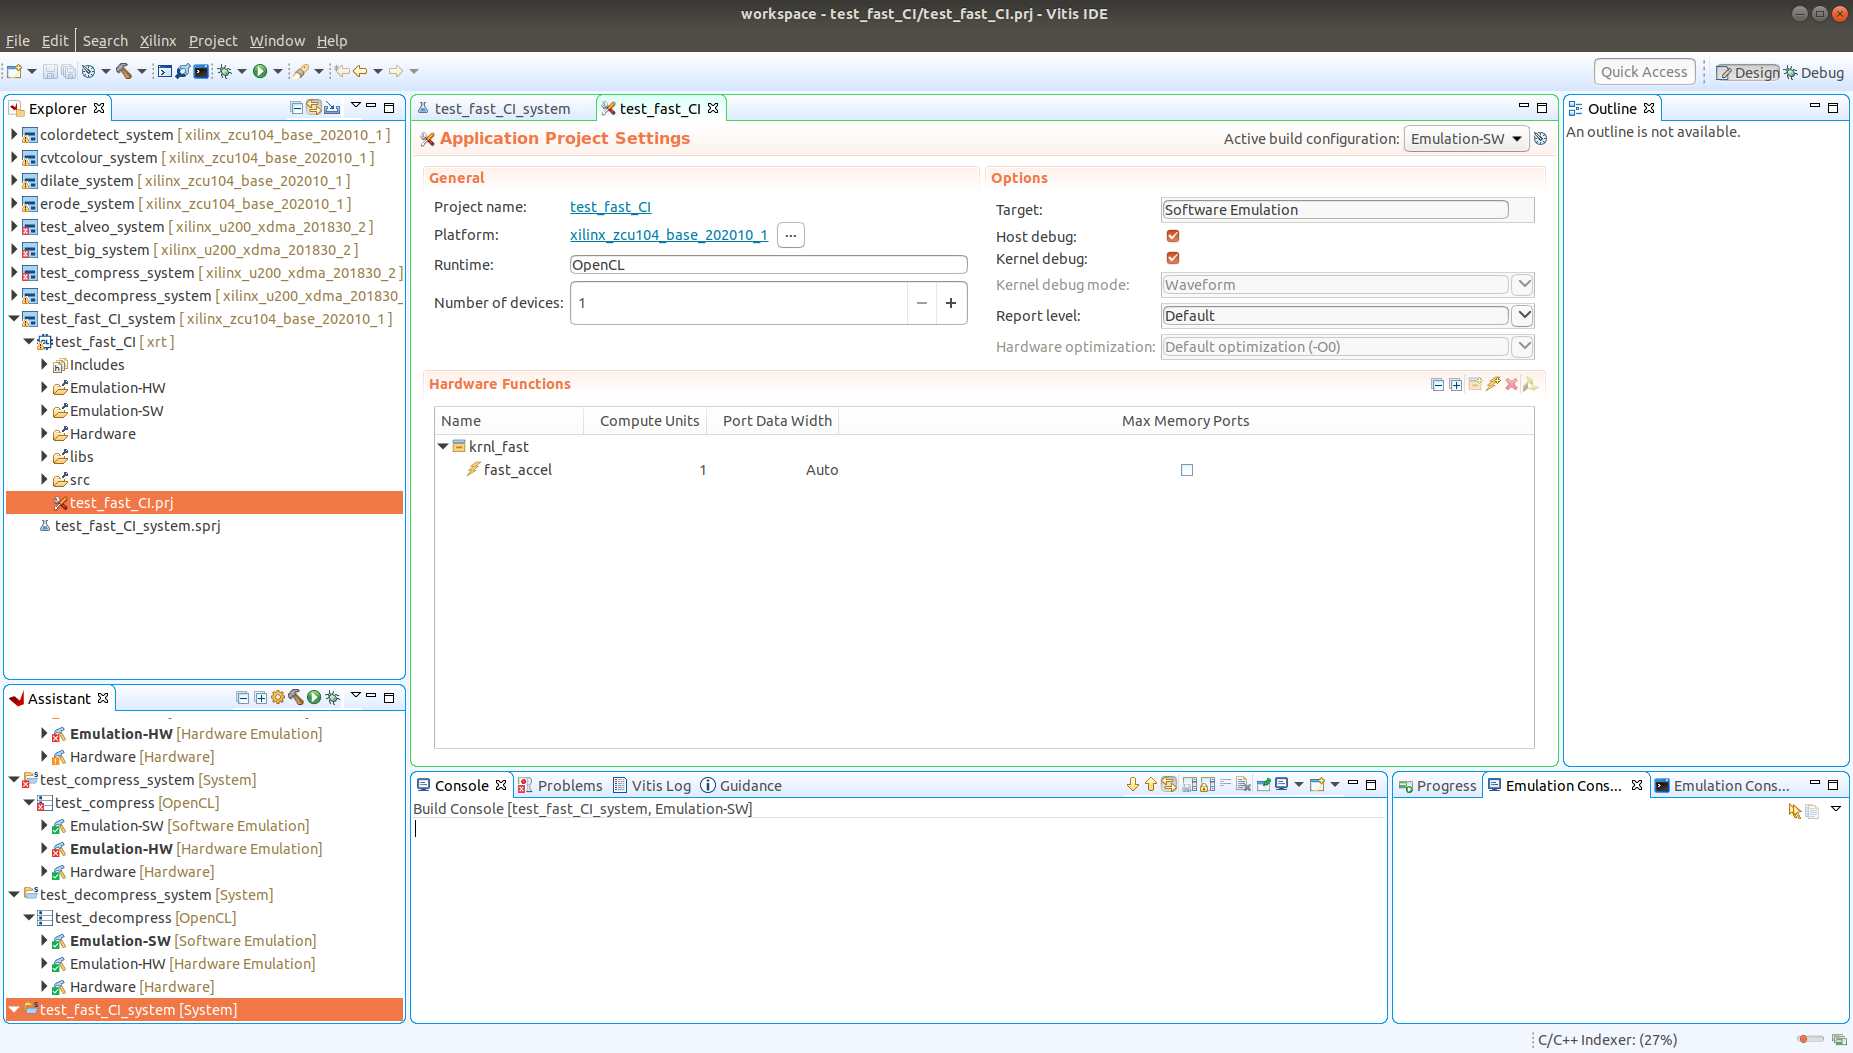
- Create a new project
- Go to
File->Project->New - Select the xilinx_zcu104_base_202010_1 board then click next
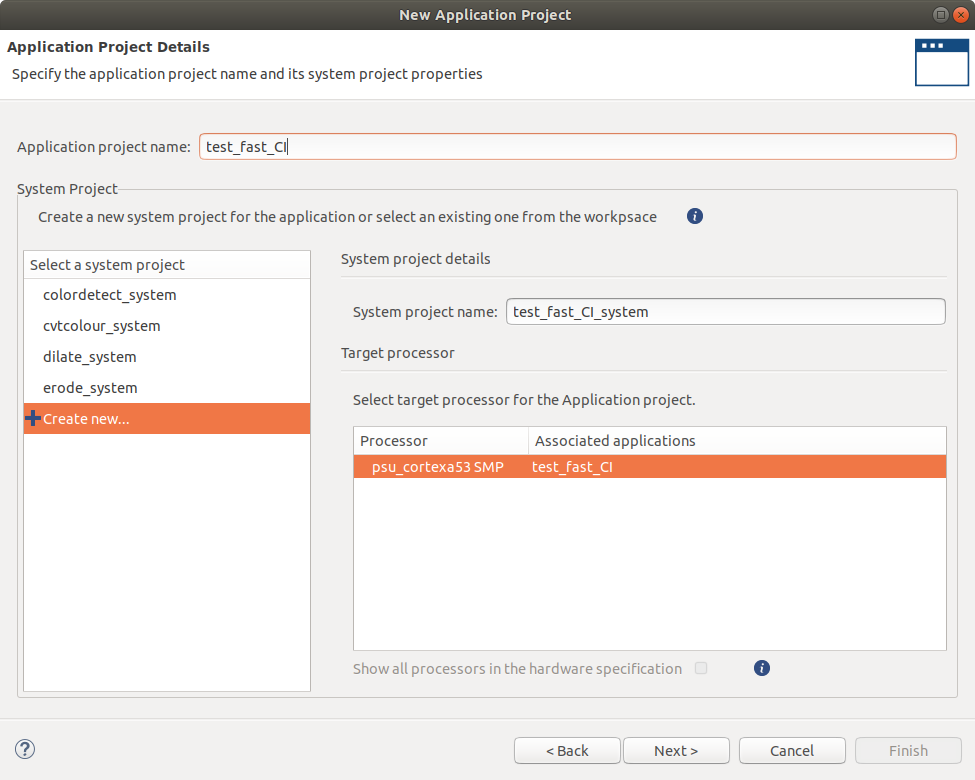
- Name the project
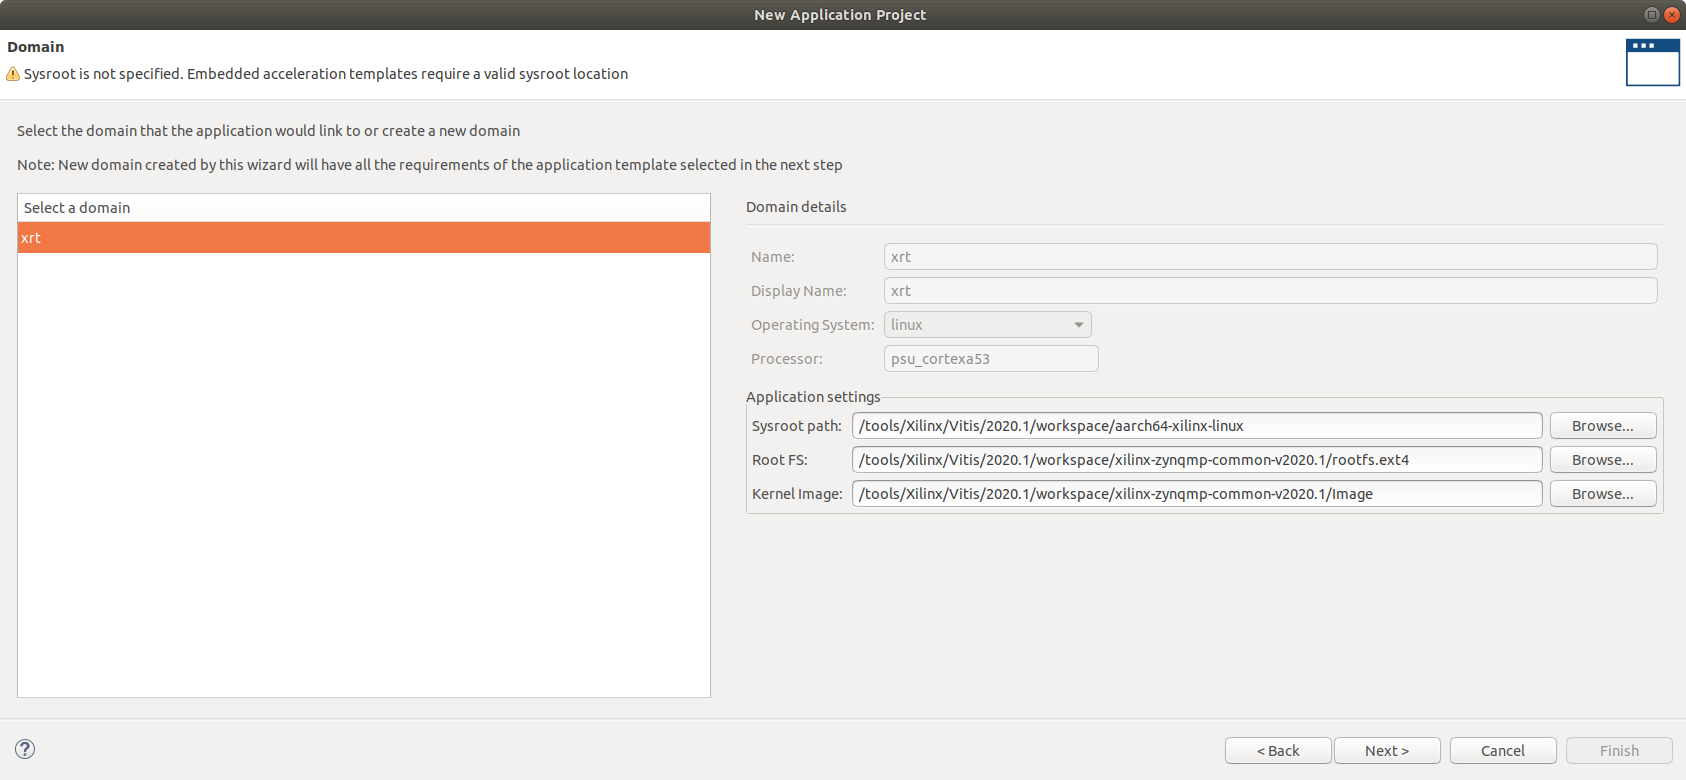
test_fast_CI, click next - Add the sysroot and image we downloaded from xilinx, then click next
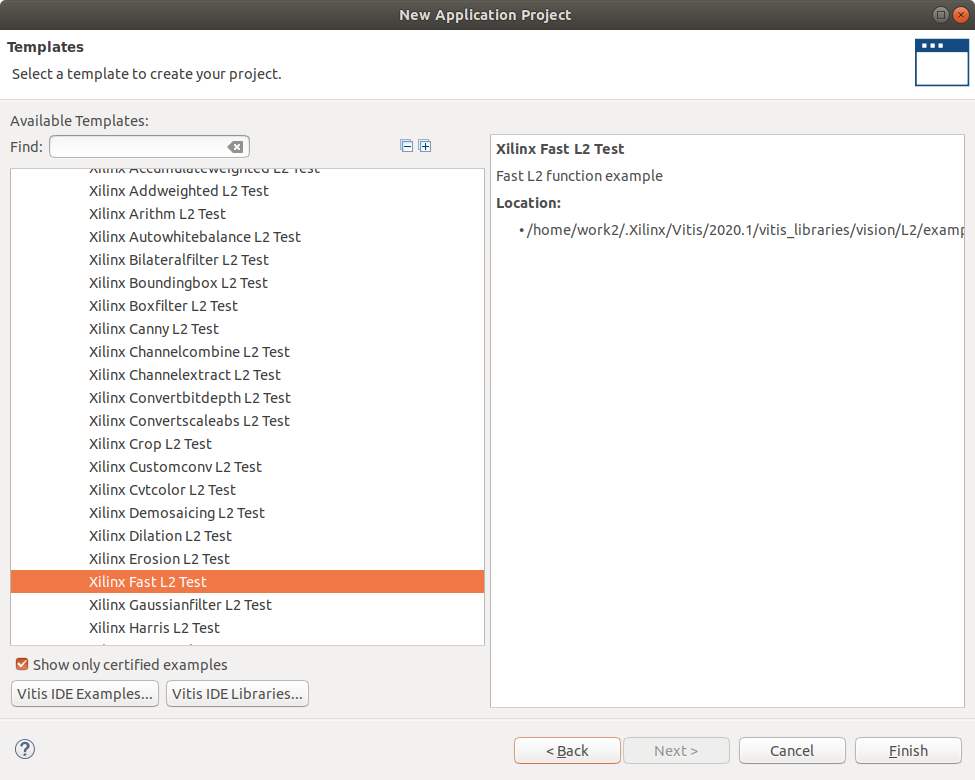
- As shown below select the fast template from L2 folder in the vitis vision library
- Click finish
- Go to
- Click the hammer to build the sw-emulation project for the system then repeat this for the hardware and hardware-emu by selecting the different active builds
Simulate
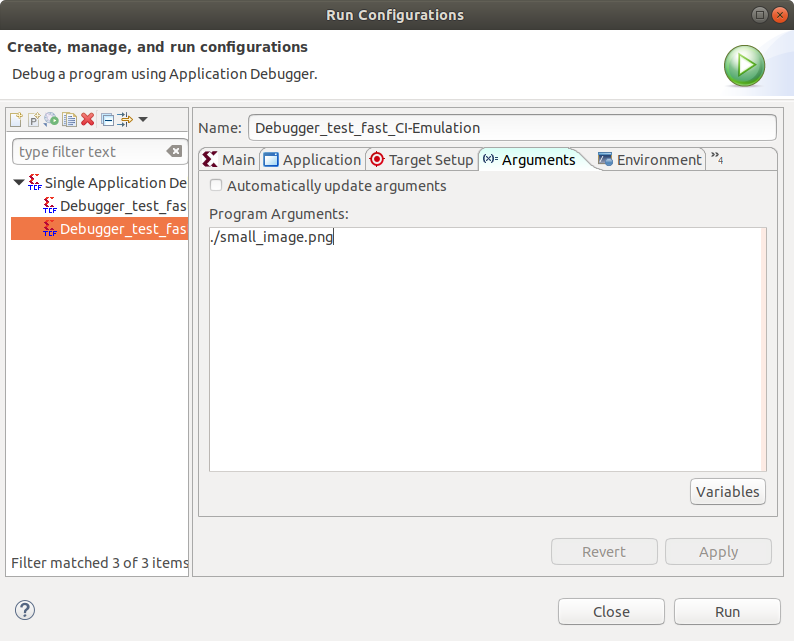
Right click on the project and select run configurations then select arguments and uncheck Automaticly update arguments.
Then type the following in the arguments box ./small_image.png
Click apply then run
CI integration
Now we have verified our FAST locally, we will integrate it with BeetleboxCI. Using BeetleboxCI will allow us to regularly iterate on the FAST, so any changes such as additional modules can be automatically tested. It will also allow us to run simulations for long periods of time without using local computing resources, allowing the user to focus on other parts of a system.
We need to add some scripts to help build and simulate on the CI. First we will add simple build scripts to build the SW-emulation, HW-emulation and Hardware. Then we will add Simulation scripts to simulate the FAST on the CI.
Make a file called build.sh copy the folling content and add it to the Emulation-HW folder in the project root. Then open a terminal where the file is located and change the permissions to using the following line chmod 777 build.sh
#!/bin/bash -f
source /tools/Xilinx/Vitis/2020.1/settings64.sh
cd Emulation-HW/
make -j2 clean
make -j2 incremental
retval=$?
cd ..
if [ "$retval" == 0 ]
then
     exit 0
else
     exit 1
fi
Make a file called build.sh copy the following content and add it to the Hardware folder in the project root. Then open a terminal where the file is located and change the permissions to using the following line chmod 777 build.sh
#!/bin/bash -f
source /tools/Xilinx/Vitis/2020.1/settings64.sh
cd Hardware/
make -j2 clean
make -j2 incremental
retval=$?
cd ..
if [ "$retval" == 0 ]
then
     exit 0
else
     exit 1
fi
Make a file called build.sh copy the following content and add it to the Emulation-SW folder in the project root. Then open a terminal where the file is located and change the permissions using the following line chmod 777 build.sh
#!/bin/bash -f
source /tools/Xilinx/Vitis/2020.1/settings64.sh
cd Emulation-SW/
make -j2 clean
make -j2 incremental
retval=$?
cd ..
if [ "$retval" == 0 ]
then
     exit 0
else
     exit 1
fi
Now to add simulation files to make simulation easy on the CI:
Make a file called hw_emu.sh copy the following content and add it to the project root folder. Then open a terminal where the file is located and change the permissions using the following line chmod 777 hw_emu.sh
#!/bin/bash -f
Emulation-HW/launch.sh
Emulation-HW/launch.expect
Make a launch.sh file with the following code to run the simulation. Then open a terminal where the file is located and change the permissions using the following line chmod 777 launch.sh
#!/bin/bash -f
source /tools/Xilinx/Vitis/2020.1/settings64.sh
cd Emulation-HW/package/
killall -9 qemu-system-aarch64
killall pllauncher
EMUDIR="$PWD/package"
    if [ -d "$EMUDIR" ]
      then
      OUTDIR=$EMUDIR
      cd $OUTDIR
      echo "Current working dir $OUTDIR"
      if [ -e "qemu_args.txt" ]
        then
        echo "Required emulation files like qemu_args exists"
      else
        echo "Required emulation files like qemu_args.txt doesn't exist. Please run from output dir"
        exit 1
      fi
    else
        if [ -e "qemu_args.txt" ]
          then
          echo "Required emulation files like qemu_args exists"
          cd .
          echo "Current working dir $PWD"
        else
          echo "Required emulation files like qemu_args.txt doesn't exist. Please run from output dir"
          exit 2
        fi
    fi
Make a launch.expect file with the following code to read the simulation output. Then open a terminal where the file is located and change the permissions to using the following line chmod 777 launch.expect
#!/usr/bin/expect -f

set timeout -1

spawn /tools/Xilinx/Vitis/2020.1/bin/launch_emulator -device-family ultrascale -target hw_emu -qemu-args-file Emulation-HW/package/qemu_args.txt -pmc-args-file Emulation-HW/package/pmu_args.txt -pl-sim-dir Emulation-HW/package/sim/behav_waveform/xsim -sd-card-image Emulation-HW/package/sd_card.img -enable-prep-target -xtlm-log-state WAVEFORM_AND_LOG -forward-port 2222 22

expect "PetaLinux 2020.1 zynqmp-common-2020_1 ttyPS0"

expect "# "
send "\n"

expect "# "
send "\n"

expect "# "
send "cd /mnt\n"

expect "# "
send "cd sd-mmcblk0p1\n"

expect "# "
send "source ./init.sh\n"

expect "# "
send "export XCL_EMULATION_MODE=hw_emu"
send "\n"

expect "# "
send "export XILINX_XRT=/usr"
send "\n"

expect "# "
send "export XILINX_VITIS=/mnt/sd-mmcblk0p1/"
send "\n"

expect "# "
send "export LD_LIBRARY_PATH=/mnt/sd-mmcblk0p1/:/tmp"
send "\n"

expect "# "
send "./test_fast_CI small_image.png\n"

expect "# "
send "exit\n"
exit 0
Make a file called sw_emu.sh copy the folling content and add it to the project root folder. Then open a terminal where the file is located and change the permissions using the following line chmod 777 sw_emu.sh
#!/bin/bash -f
Emulation-SW/launch.sh
Emulation-SW/launch.expect
Make a launch.sh file with the following code to run the simulation. Then open a terminal where the file is located and change the permissions using the following line chmod 777 launch.sh
#!/bin/bash -f
source /tools/Xilinx/Vitis/2020.1/settings64.sh
cd Emulation-SW/package/
killall -9 qemu-system-aarch64
killall pllauncher
EMUDIR="$PWD/package"
    if [ -d "$EMUDIR" ]
      then
      OUTDIR=$EMUDIR
      cd $OUTDIR
      echo "Current working dir $OUTDIR"
      if [ -e "qemu_args.txt" ]
        then
        echo "Required emulation files like qemu_args exists"
      else
        echo "Required emulation files like qemu_args.txt doesn't exist. Please run from output dir"
        exit 1
      fi
    else
        if [ -e "qemu_args.txt" ]
          then
          echo "Required emulation files like qemu_args exists"
          cd .
          echo "Current working dir $PWD"
        else
          echo "Required emulation files like qemu_args.txt doesn't exist. Please run from output dir"
          exit 2
        fi
    fi
Make a launch.expect file with the following code to read the simulation output. Then open a terminal where the file is located and change the permissions using the following line chmod 777 launch.expect
#!/usr/bin/expect -f

set timeout -1

spawn /tools/Xilinx/Vitis/2020.1/bin/launch_emulator -device-family ultrascale -target sw_emu -qemu-args-file Emulation-SW/package/qemu_args.txt -pmc-args-file Emulation-SW/package/pmu_args.txt -sd-card-image Emulation-SW/package/sd_card.img -enable-prep-target

expect "PetaLinux 2020.1 zynqmp-common-2020_1 ttyPS0"

expect "# "
send "\n"

expect "# "
send "\n"

expect "# "
send "cd /mnt\n"

expect "# "
send "cd sd-mmcblk0p1\n"

expect "# "
send "source ./init.sh\n"

expect "# "
send "export XCL_EMULATION_MODE=sw_emu"
send "\n"

expect "# "
send "export XILINX_XRT=/usr"
send "\n"

expect "# "
send "export XILINX_VITIS=/mnt/sd-mmcblk0p1/"
send "\n"

expect "# "
send "export LD_LIBRARY_PATH=/mnt/sd-mmcblk0p1/:/tmp"
send "\n"

expect "# "
send "./test_fast_CI  small_image.png\n"

expect "# "
send "exit\n"
exit 0
Make a folder called .bbx in the same folder root directory and add a file called config.yaml with the following code:
runners:
 local-runner:
  image: ubuntu-vitis-2020-1

jobs:
 build-SW-emu:
  runner: local-runner
  type:
   build: software
  current_working_directory: /tools/Xilinx/Vitis/2020.1/workspace/test_fast_CI
  input:
   artifact:
    - xilinx_zcu104_base_202010_1.zip
    - aarch64-xilinx-linux.zip
    - xilinx-zynqmp-common-v2020.1.zip
  output:
   artifact:
    - Emulation-SW
    - sw_emu.sh
  steps:
   - run:
      name: Download files
      command: |
       git clone https://github.com/mwijeyasinghebbx/test_images
       mv test_images/* /tools/Xilinx/Vitis/2020.1/platforms/xilinx_zcu104_base_202010_1/sw/xilinx_zcu104_base_202010_1/xrt/image/
      type: miscellaneous
   - run:
      name: Run Software Emulation Build
      command: Emulation-SW/build.sh
      type: sw-emulation
 test-sw-emulation:
  runner: local-runner
  depends:
   - build-SW-emu
  type:
   test: sw-emulation
  current_working_directory: /tools/Xilinx/Vitis/2020.1/workspace/test_fast_CI
  input:
   artifact:
    - build-SW-emu
    - xilinx_zcu104_base_202010_1.zip
  steps:
   - run:
      name: Run Software Emulation
      command: ./sw_emu.sh
 build-HW-emu:
  runner: local-runner
  type:
   build: hw-emulation
  current_working_directory: /tools/Xilinx/Vitis/2020.1/workspace/test_fast_CI
  output:
   artifact:
    - Emulation-HW/build.sh
    - hw_emu.sh
    - Emulation-HW/launch.sh
    - Emulation-HW/launch.expect
    - Emulation-HW/package
  input:
   artifact:
    - xilinx_zcu104_base_202010_1.zip
    - aarch64-xilinx-linux.zip
    - xilinx-zynqmp-common-v2020.1.zip
  steps:
   - run:
      name: Download files
      command: |
       git clone https://github.com/mwijeyasinghebbx/test_images
       mv test_images/* /tools/Xilinx/Vitis/2020.1/platforms/xilinx_zcu104_base_202010_1/sw/xilinx_zcu104_base_202010_1/xrt/image/
      type: miscellaneous
   - run:
      name: Run Hardware Emulation Build
      command: Emulation-HW/build.sh
      type: hw-emulation
 test-hw-emulation:
  runner: local-runner
  depends:
   - build-HW-emu
  type:
   test: hw-emulation
  current_working_directory: /tools/Xilinx/Vitis/2020.1/workspace/test_fast_CI
  input:
   artifact:
    - build-HW-emu
    - xilinx_zcu104_base_202010_1.zip
  steps:
   - run:
      name: Hardware Emulation
      command: ./hw_emu.sh
 build-HW:
  runner: local-runner
  type:
   build: hardware
  current_working_directory: /tools/Xilinx/Vitis/2020.1/workspace/test_fast_CI
  input:
   artifact:
    - xilinx_zcu104_base_202010_1.zip
    - aarch64-xilinx-linux.zip
    - xilinx-zynqmp-common-v2020.1.zip
  steps:
   - run:
      name: Build HW
      command: Hardware/build.sh
      type: Hardware
workflows:
 complete-build-test:
  jobs:
   - build-SW-emu
   - test-sw-emulation
   - build-HW-emu
   - test-hw-emulation
   - build-HW
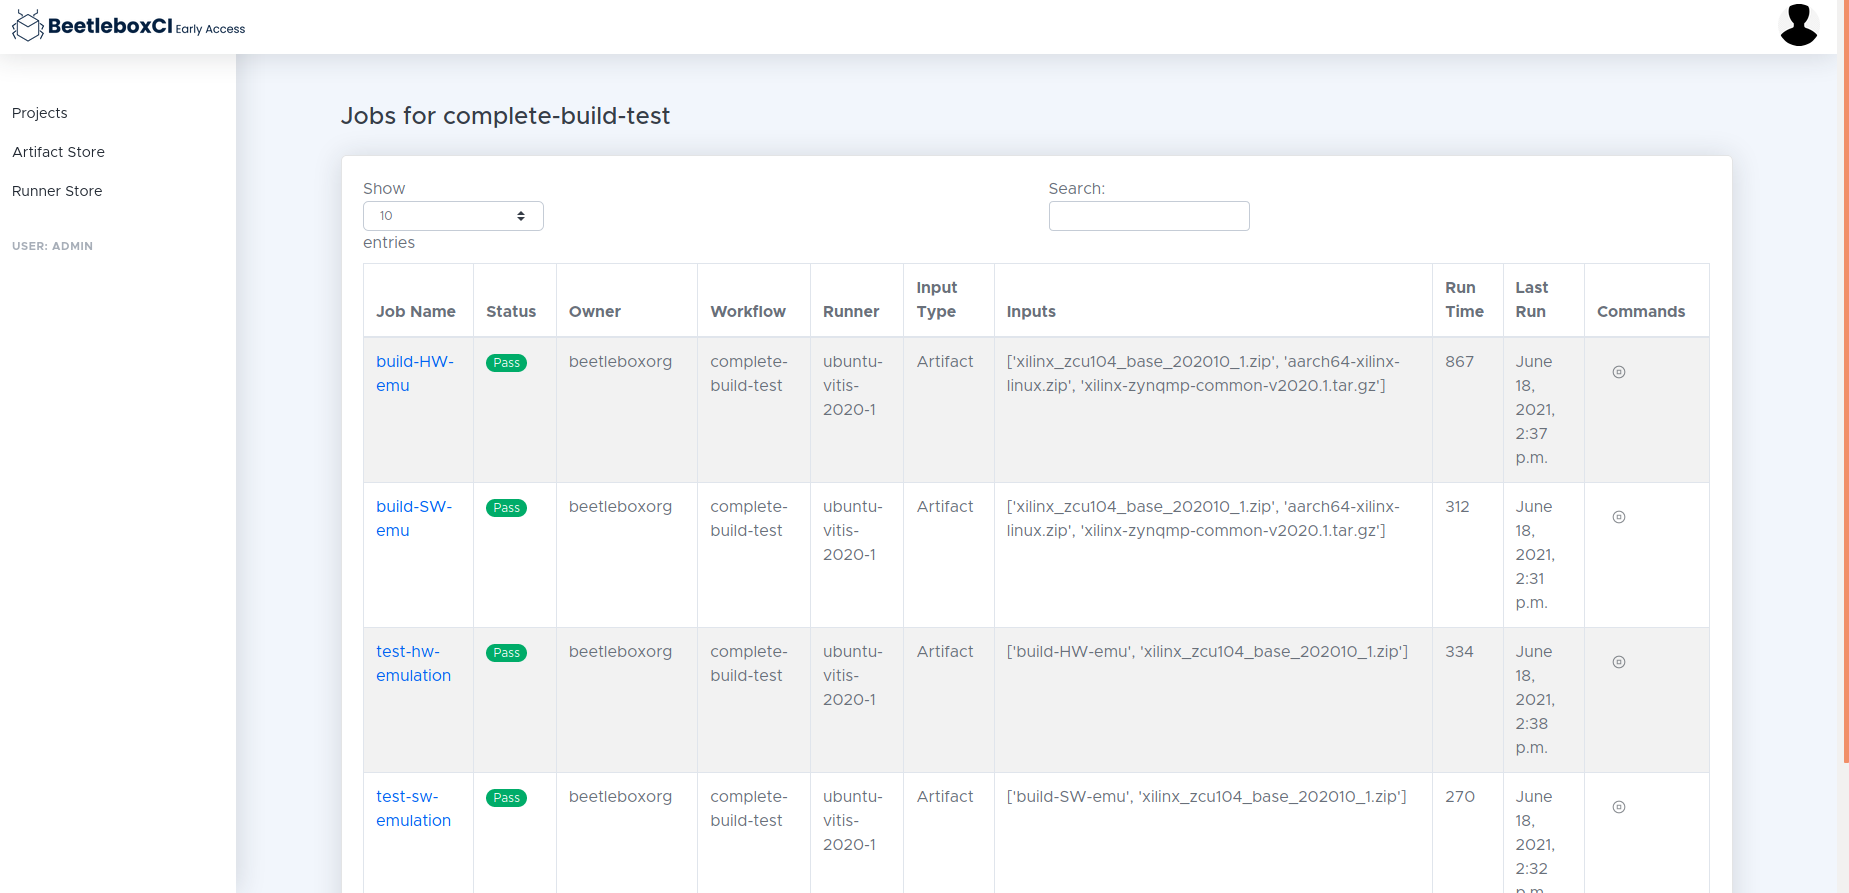
The .bbx/config.yaml is the configuration file that BeetleboxCI will use to automate this application. Each project in BeetleboxCI consists of a pipeline, which is made of different workflows. Workflows are a series of jobs that are to be executed are configurable by the user in the configuration file under the workflows section. These jobs are then specified under the jobsand in our case we have a single job called build_run_sim. We specify the runner to be used as local-runner, which uses the machine image ubuntu-vitis-2020-1. This machine image is specifically designed to run Vitis and Vivado tools and provides 4 CPUS and 32GB of RAM. We also specify that the type is a build:hardware. This is an optional setting, but can be use to help identify what the purpose of this build is. We then identify the artifacts that are to be stored in out artifact store. Finally, we provide the steps that the job is to perform. We need to run commands in a bash shell, so we use the run command step. We provide name and the individual commands to be run in our bash shell through command.
We need to ensure that only source code is committed to our Github repository and not large build files. To do so, we make a .gitignore file in the project root directory and add the following code:
!.bbx/*.yaml

######################Custom User Ignores#####################
#Ignore any folders that contains large files
large_file_folder/
_ide/
Emulation-SW/krnl_fast.build
Emulation-SW/*.xclbin
Emulation-SW/*.build
Emulation-SW/.Xil
Emulation-SW/src
Emulation-SW/package.build
Emulation-SW/package
Emulation-SW/ip_cache
Hardware/krnl_fast.build
Hardware/*.xclbin
Hardware/.Xil
Hardware/src
Hardware/package.build
Hardware/package
Hardware/ip_cache
Emulation-HW/krnl_fast.build
Emulation-HW/*.xclbin
Emulation-HW/.Xil
Emulation-HW/src
Emulation-HW/package.build
Emulation-HW/package
Emulation-HW/ip_cache

#Compiled files
*.xclbin
*.info
*.link_summary
*.xclbin.sh
*.json
*.mdb
*.package_summary
*.img
hw_tester


#Ignore any files used for debugging
*.debug
*.prj
.settings
.project
.cproject
*.png
*.jou

######################Default Python ignores#####################
# Byte-compiled / optimized / DLL files
__pycache__/
*.py[cod]
*$py.class

# C extensions
*.so

# Distribution / packaging
.Python
env/
build/
develop-eggs/
dist/
downloads/
eggs/
.eggs/
lib64/
parts/
sdist/
var/
wheels/
*.egg-info/
.installed.cfg
*.egg

# PyInstaller
#  Usually these files are written by a python script from a template
#  before PyInstaller builds the exe, so as to inject date/other infos into it.
*.manifest
*.spec

# Installer logs
pip-log.txt
pip-delete-this-directory.txt

# Unit test / coverage reports
htmlcov/
.tox/
.coverage
.coverage.*
.cache
nosetests.xml
coverage.xml
*.cover
.hypothesis/

# Translations
*.mo
*.pot

# Django stuff:
*.log
local_settings.py

# Flask stuff:
instance/
.webassets-cache

# Scrapy stuff:
.scrapy

# Sphinx documentation
docs/_build/

# PyBuilder
target/

# Jupyter Notebook
.ipynb_checkpoints

# pyenv
.python-version

# celery beat schedule file
celerybeat-schedule

# SageMath parsed files
*.sage.py

# dotenv
.env

# virtualenv
.venv
venv/
ENV/

# Spyder project settings
.spyderproject
.spyproject

# Rope project settings
.ropeproject

# mkdocs documentation
/site

# mypy
.mypy_cache/


#Ignore compiled code
*.pyc

#Ignore files generated at runtime
*.out


######################Default C ignores#####################
# Prerequisites
*.d

# Object files
*.o
*.ko
*.obj
*.elf

# Linker output
*.ilk
*.map
*.exp

# Precompiled Headers
*.gch
*.pch

# Libraries
*.lib
*.a
*.la
*.lo

# Shared objects (inc. Windows DLLs)
*.dll
*.so
*.so.*
*.dylib

# Executables
*.exe
*.out
*.app
*.i*86
*.x86_64
*.hex

# Debug files
*.dSYM/
*.su
*.idb
*.pdb

# Kernel Module Compile Results
*.mod*
*.cmd
.tmp_versions/
modules.order
Module.symvers
Mkfile.old
dkms.conf

######################Default C++ ignores#####################
# Prerequisites
*.d

# Compiled Object files
*.slo
*.lo
*.o
*.obj

# Precompiled Headers
*.gch
*.pch

# Compiled Dynamic libraries
*.so
*.dylib
*.dll

# Fortran module files
*.mod
*.smod

# Compiled Static libraries
*.lai
*.la
*.a
*.lib

# Executables
*.exe
*.out
*.app
- Create a new Github Repository. Name the repository
test_fast_CI. and upload the project to it. - Now log into your BeetleboxCI account here.
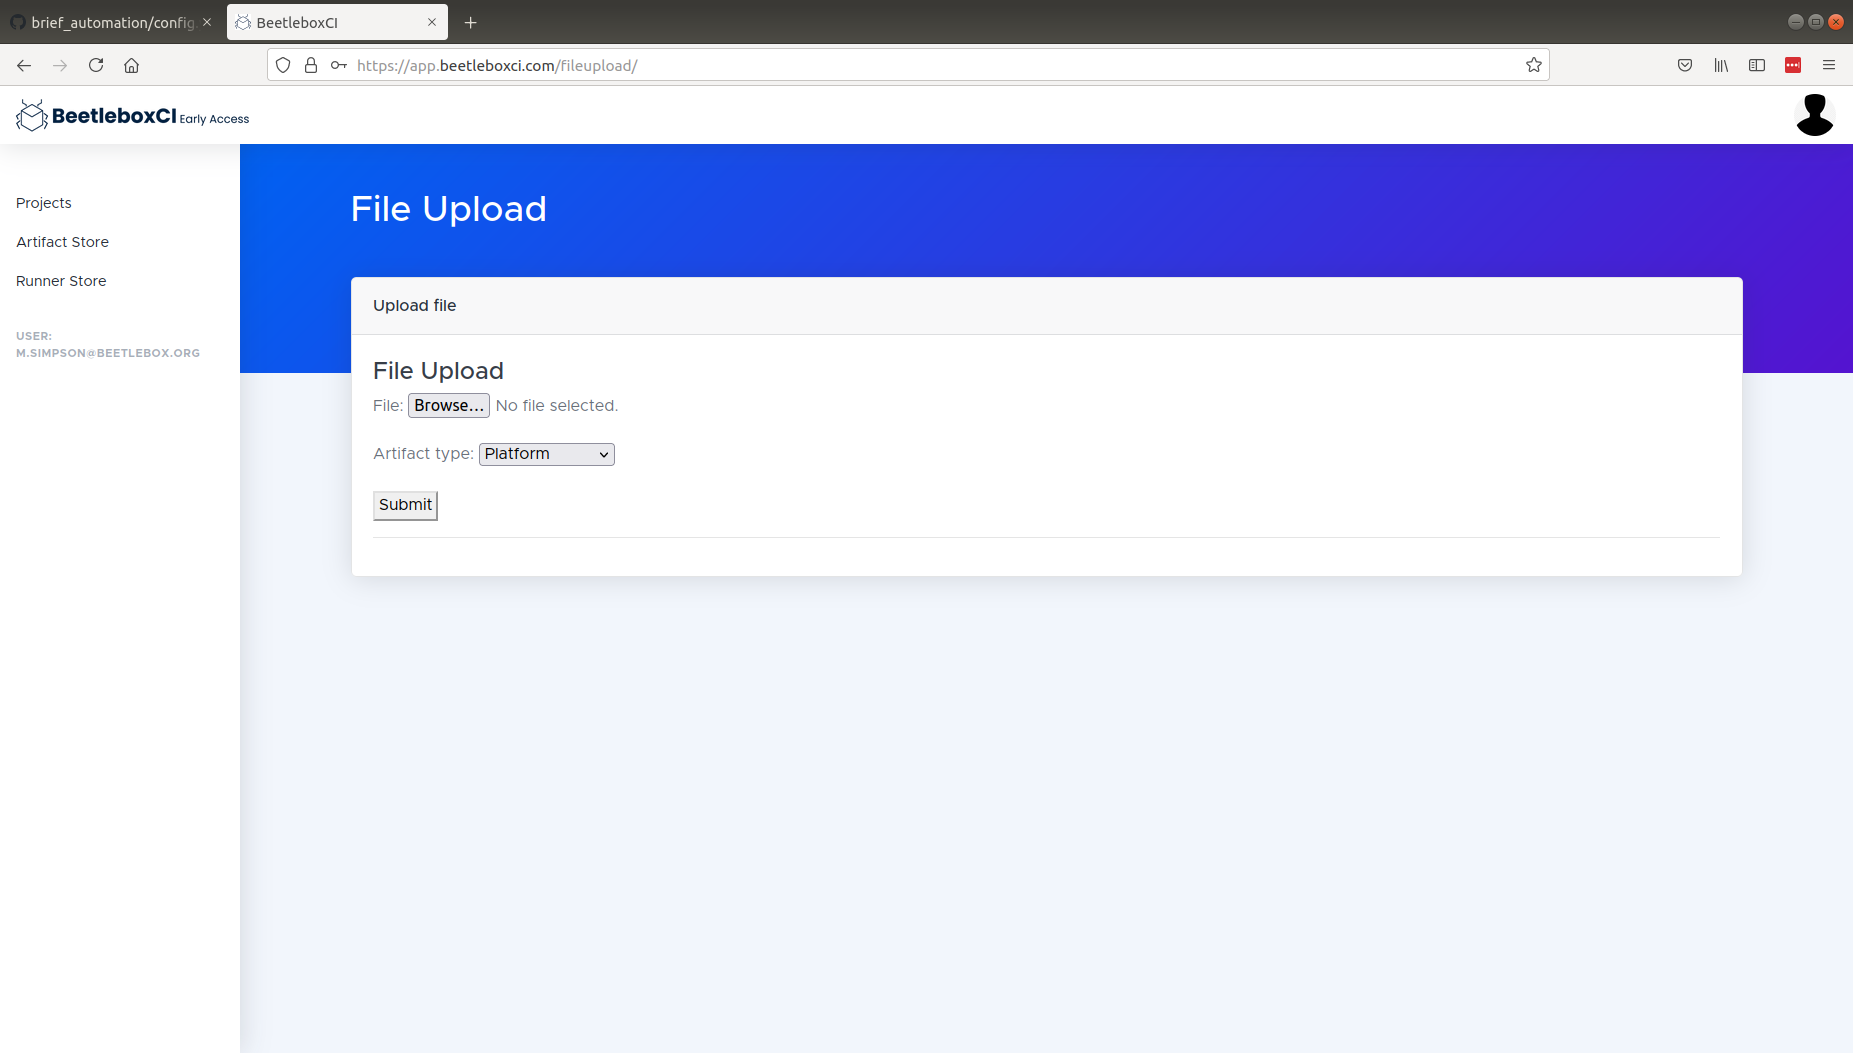
- You will see the following screen, click
Artifact StorethenArtifact StoreUpload Atifact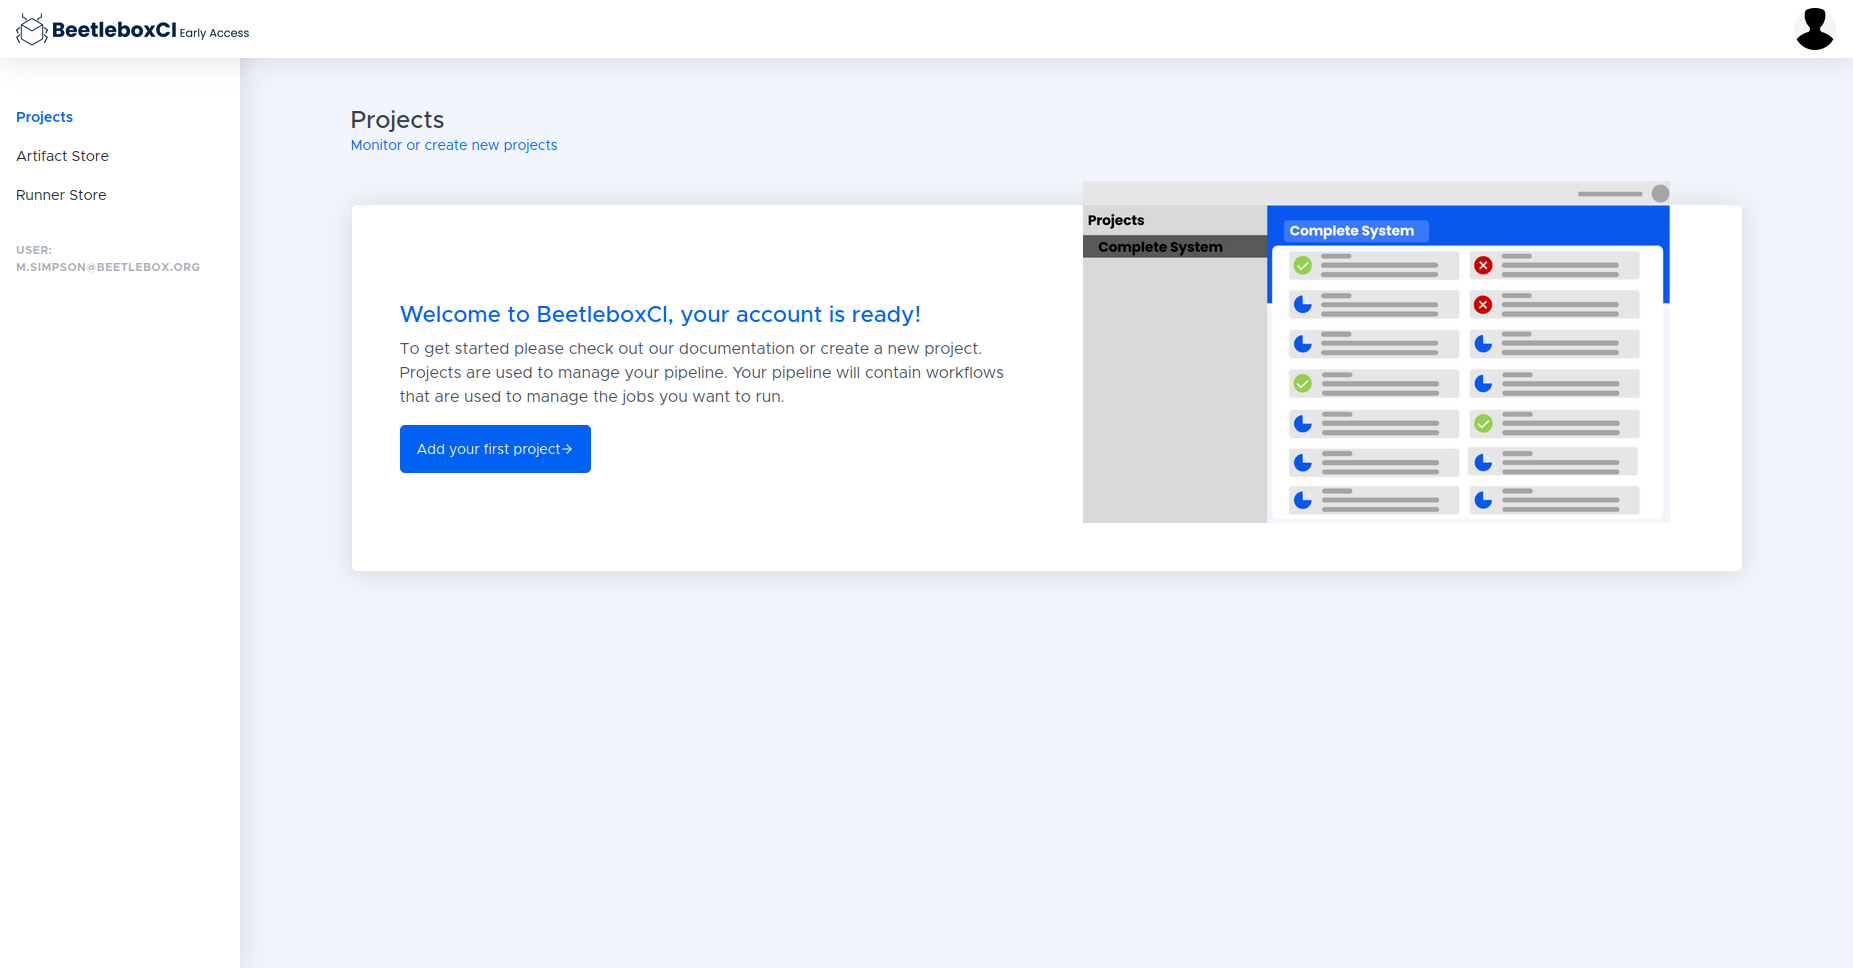
- Upload the platform that we downloaded from Xilinx
- Next upload the sysroot and choose library
- Then upload the common image
- Then follow the procedure to create a new pipeline by going to the Pipelines link on the left hand navigation pane and clicking Add Pipeline.
- Fill in the details for the project name, URL, and the Login details and click
Submit. - To run the pipeline on the CI, we must go into the pipeline and click the run button on the top right of the Workflows list.
Review
- Open the project in the CI
- Navigate to the logs of the test-se-emulation
- Click logs
- Compare this to the simulation output of the Vitis terminal