Software Emulation of a Vitis Project
This tutorial uses the Vector Addition example provided by Vitis as part of the Vitis installation.
Create Vitis Project
Create a Vitis Project called vector_add using the template provided by Vitis. Please refer to the Vitis documentation for more information on this.
Set up config data
Before you can create a pipeline, you need to create a code repository that will form the code base of the pipeline. You may wish to use the code from this repository provided by Beetlebox, which already has the code and necessary files for the pipeline to run.
To run a project we need a folder called .bbx in the project root directory and a file called config.yaml. The .bbx/config.yaml is the configuration file that BeetleboxCI will use to automate this application.
We specify the runner to be used as example-runner, which uses the container image work1-virtualbox:5000/ubuntu_vitis_2020_1:latest. This image is specifically designed to run Vitis and Vivado tools. You will need to change the name of the image used for the runner. The name will be based on the IP address or server name of your machine.
These instructions are written assuming that you will make your own code repository.
It is important to note the current_working_directory variable in the config data.
Vitis usually generates makefiles using absolute file paths, such that it would not directly run if moved to a different directory.
When projects are created within the installation directory of Vitis, Vitis uses relative file directories in the makefiles it generates and it allows the project directories to be relocated.
- Create a new folder called
.bbxin a Github code repository. - Create a file called
config.yamlin the folder you just created and paste in the following code (you will need to edit work1-virtualbox to the name or IP address of the server you have installed BeetleboxCI on):
runners:
 example-runner:
  image: work1-virtualbox:5000/ubuntu_vitis_2020_1:latest

jobs:
 build-swemu-vec:
  resource_spec: large
  runner: example-runner
  current_working_directory: /tools/Xilinx/Vitis/2020.1/workspace/vadd
  input:
   artifact:
    - xilinx_zcu104_base_202010_1.zip
    - aarch64-xilinx-linux2020_1.zip
    - xilinx-zynqmp-common-v2020.1.tar.gz

  output:
   artifact:
    - Emulation-SW/package
  steps:
   - run:
      name: Run Software Emulation Build
      command: |
       Emulation-SW/build.sh


 test-sw-emulation:
  resource_spec: large
  runner: example-runner
  depends:
   - build-swemu-vec
  current_working_directory: /tools/Xilinx/Vitis/2020.1/workspace/vadd
  device: zcu104-virtual-swemu-vitis20201
  input:
   artifact:
    - build-swemu-vec
    - xilinx_zcu104_base_202010_1.zip
  steps:
   - run:
      name: Run swemu device
      on-device: True
      pass: TEST PASSED
      fail: TEST FAILED
      command: |
       cd /mnt
       cd sd-mmcblk0p1
       source ./init.sh
       export XCL_EMULATION_MODE=sw_emu
       export XILINX_XRT=/usr
       export XILINX_VITIS=/mnt/sd-mmcblk0p1/
       export LD_LIBRARY_PATH=/mnt/sd-mmcblk0p1/:/tmp
       ./vector_add binary_container_1.xclbin

workflows:
 vec-swemu-build-test:
  jobs:
   - build-swemu-vec
   - test-sw-emulation
Build and run the software emulation and push your project to a github repository to prepare them for Continuous Integration.
To do so, we must include the source files, whilst ignoring any binaries and build files using .gitignore.
Create a Device Record
Create a Device record on BeetleboxCI using the following YAML code. This record is based on the commmands that Vitis itself uses to launch qemu to emulate hardware. Note that this is not a real physical device, but only a virtual one.
devices:
 zcu104-virtual-swemu-vitis20201:
  connection: /tools/Xilinx/Vitis/2020.1/bin/launch_emulator -device-family ultrascale -target sw_emu -qemu-args-file Emulation-SW/package/qemu_args.txt -pmc-args-file Emulation-SW/package/pmu_args.txt -sd-card-image Emulation-SW/package/sd_card.img -enable-prep-target
  prompt: "root@zynqmp-common-2020_1:"
Please refer to the Devices page for more information.
Artifacts
You will need to add a number of artifacts for this tutorial, which are available on the website to download alongside Vitis. You will need:
- The platform, xilinx_zcu104_base_202010_1.zip
- Petalinux sysroot, aarch64-xilinx-linux2020_1.zip
- ZynqMP common image, xilinx-zynqmp-common-v2020.1.tar.gz
Once you download these artifacts, they will need to be uploaded through the artifacts page on the BeetleboxCI app. For the artifact type, select Platform for xilinx_zcu104_base_202010_1.zip and Firmware for the other two.
Please refer to the Artifacts page for more information.
Create pipeline
Now you have created your code repository, it is time to create a pipeline.
To proceed, please perform the following steps:
- Click 'Create pipeline'
- In the following screen, fill in the following:
Pipeline Name: vector_add_ci_tutorial
Repository URL:
https://github.com//<username/>/<repo_name/>Authentication Settings —
Username: /<The name of your git account/>Authentication Settings —
Password: /<Github personal access token/>If you created your repository with public access, then the authentication information will not be necessary. Note that Github no longer supports password authentication for cloning repositories, so a personal access token is required. If you do not already have a personal access token for Github, you can follow this link from Github which shows how to create one.
As an alternative to your username and a personal access token, you can generate an SSH key to authenticate access to private git repositories (given that the public key is added either to your Github account or just as a deploy key to the repository). More information on this can be found in the VCS Integration section.
- Click proceed. You will now be redirected to the pipelines page where you can see the pipeline that you just created.
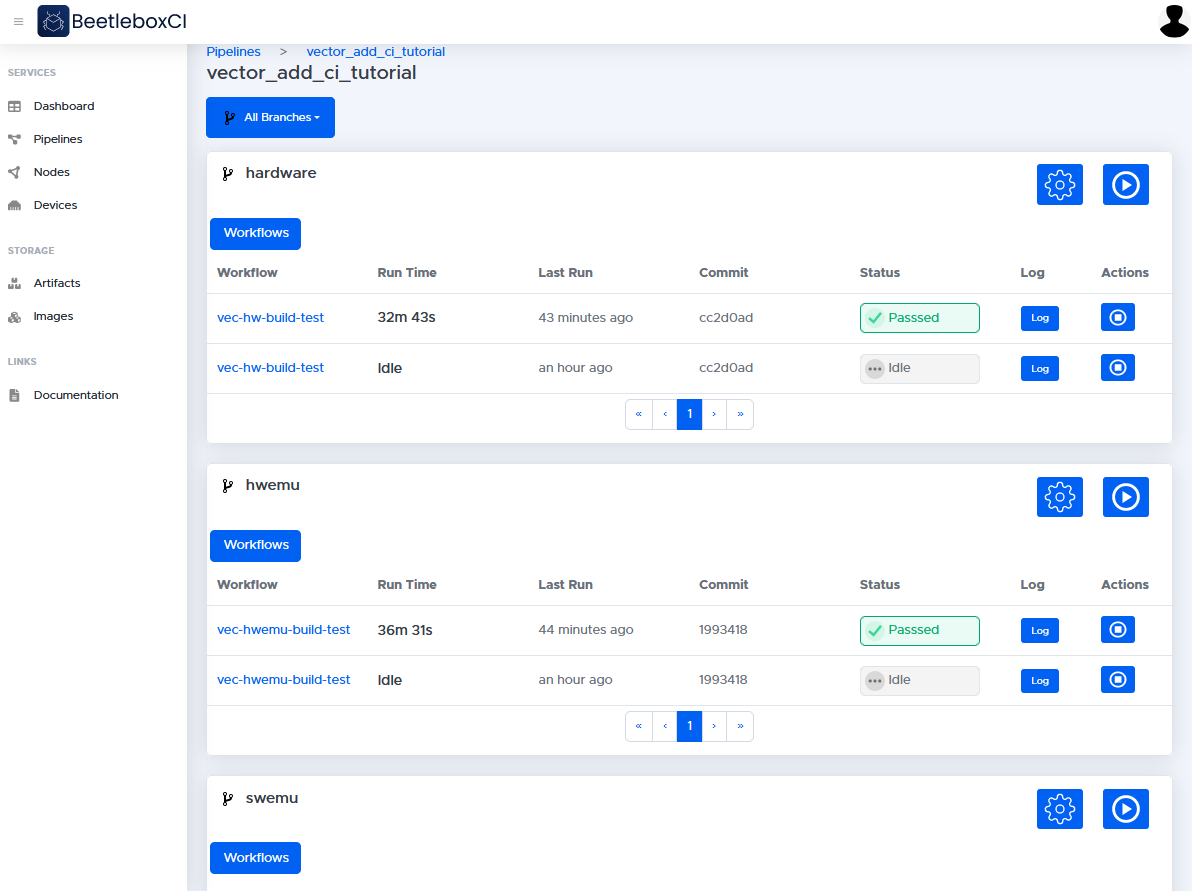
- On the pipelines page, click vector_add_ci_tutorial so see the workflows in this pipeline
- Click the run button on the top right hand corner of the workflows list. The pipeline will begin running and it should take around 30 seconds to complete.
- You will see "Passed" on the vector_add_ci_tutorial pipeline once it has completed.
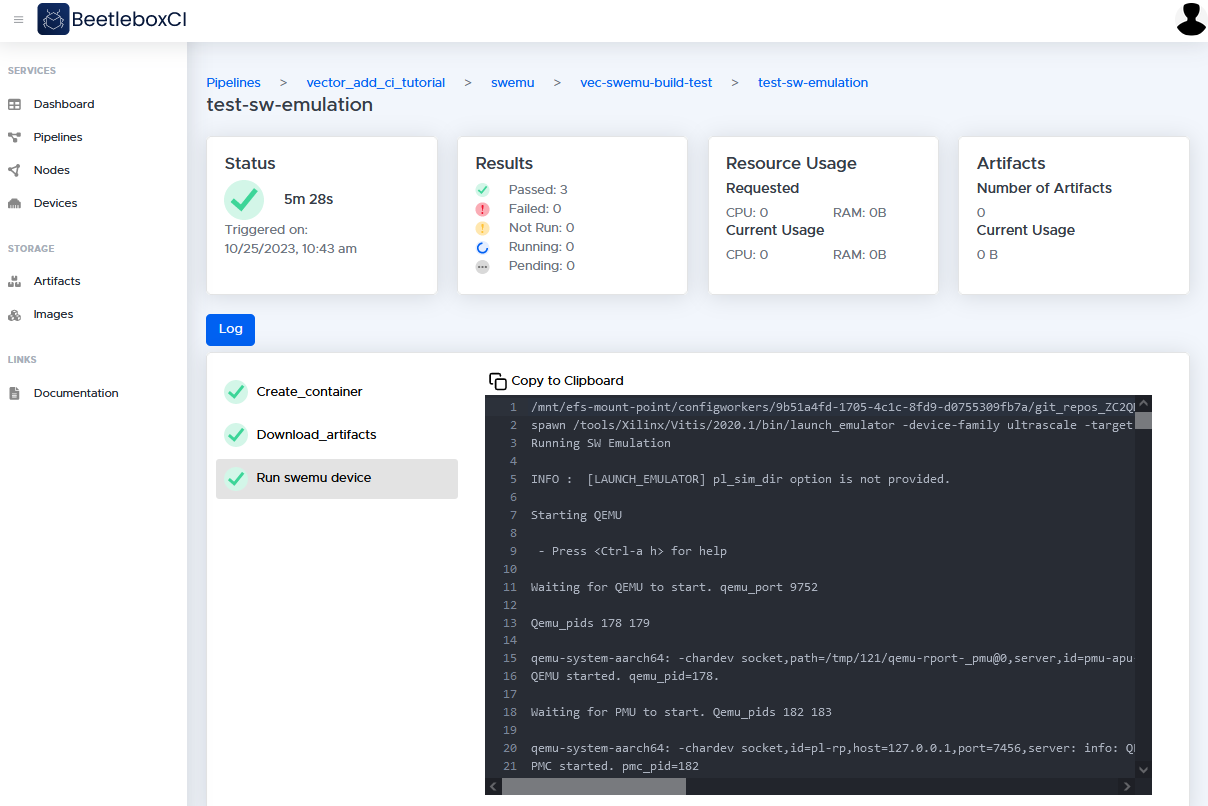
Viewing our output
- You can also check our logs to make sure the output is correct. To do this, click on the pipeline name
vector_add_ci_tutorial.

- In this page you will be able to view the workflows of the
vector_add_ci_tutorialpipeline. There will be a single workflow namedvec-swemu-build-test, which will take us to the jobs that make up that workflow.
- In the jobs page, you may view the jobs that are used in the
vec-swemu-build-testworkflow. Click on the job namesbuild-swemu-vecandtest-sw-emulation.
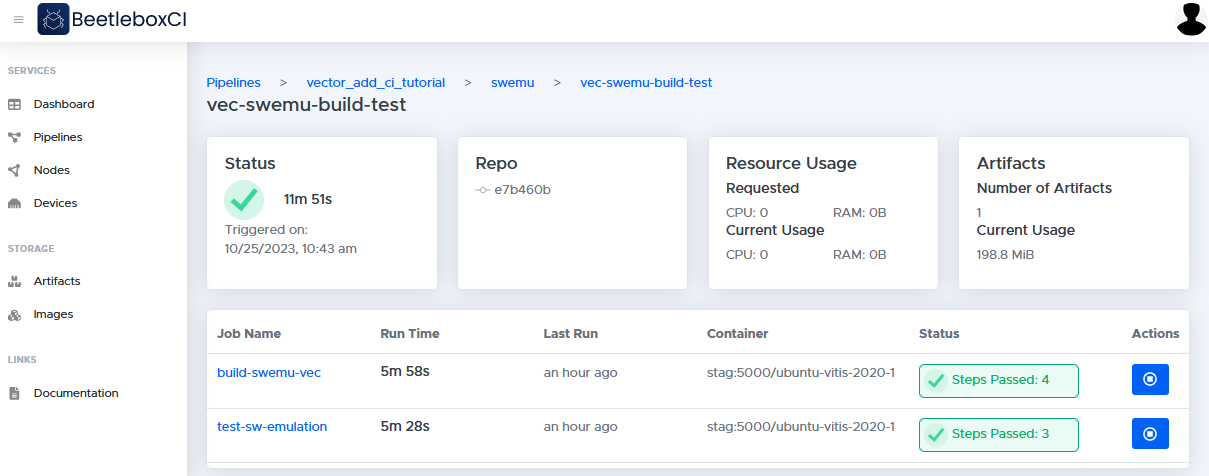
- From here, you will be able to view details about the job, including an overview of its status as well as logs and artifacts generated by this job.
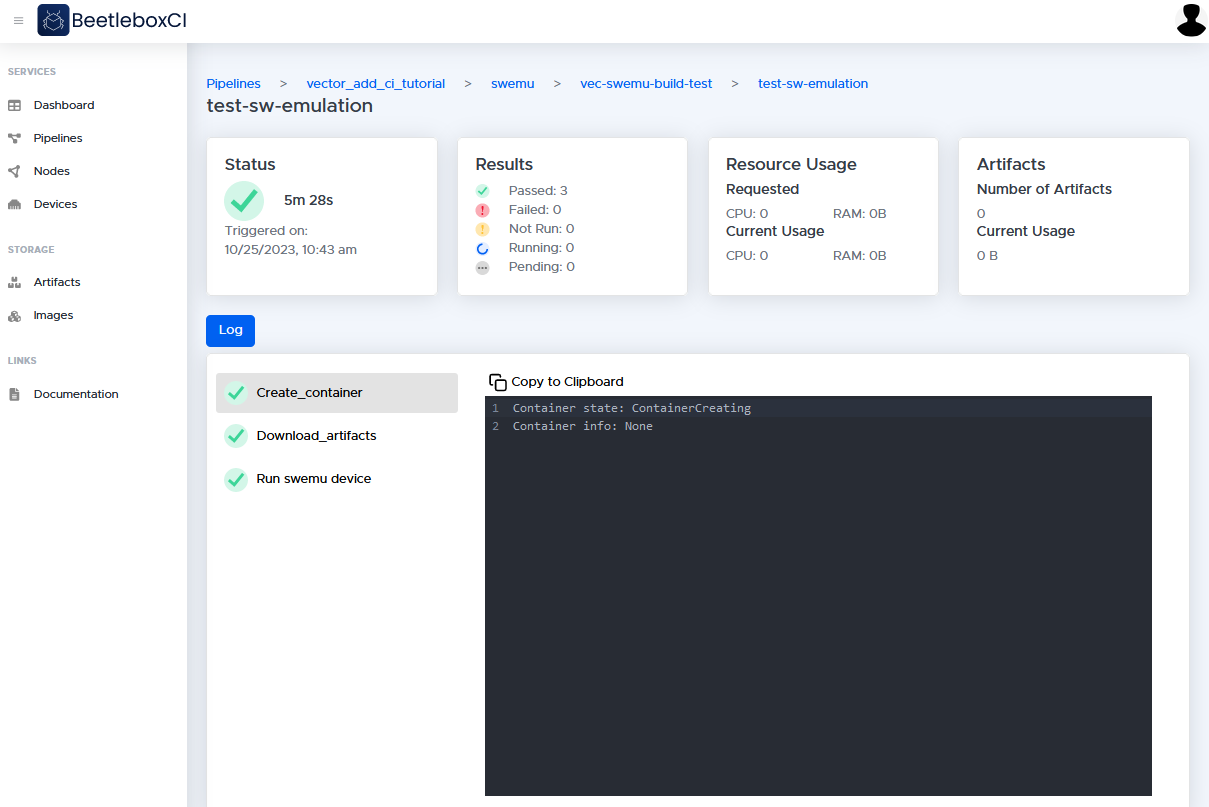
- By checking out the
Log, you can see the generated logs by the job. In this case, you will be able to see the information that the job has produced.