AVR Microcontrollers: Part 3 Unit testing and Reporting
Introduction
In the last section, you looked at monitoring basic outputs from the AVR microcontroller. In this final section, you will be looking at generating reports through the AVR microcontroller and then parsing that report:
- Using the unity C testing framework to generate a report.
- Parse the generated report with BeetleboxCI to flag if an error occurs.
You can find the source code for this example here.
Using the unity C testing framework
Adding Unity testing to your project
The unity project is a simple unit test framework for C. To use it, you need to include three files from its git repo into your project.
- First, you need to clone the unity project into the folder:
git clone https://github.com/ThrowTheSwitch/Unity.git
- From the
srcfolder in the unity repo, copy overunity.c,unity.h, andunity_internals.hinto the project folder. Delete theunityfolder. - In the MPLAB IDE, under the
Projecttab on the left hand side right clickSource Filesand clickAdd Existing Item... - In the new
Select Itempopup, findunity.c,unity.h, andunity_internals.hand highlight them. Then clickSelectand this will add the files to the source files. The directory should look as follows:
- Replace the content in
main.cwith the following:
#include "mcc_generated_files/system/system.h"
#include "unity.h"
#include <util/delay.h>

/*
    Main application
*/

/* Add the code snippet to the application code, e.g. main.c */
void setUp(void){};
void tearDown(void){};

void test_Pass(void)
{
    TEST_ASSERT_TRUE(1);
}

void test_Fail(void)
{
    TEST_ASSERT_FALSE(0);
}


int main(void)
{
    SYSTEM_Initialize();
    UNITY_BEGIN();
    RUN_TEST(test_Pass);
    RUN_TEST(test_Fail);
    UNITY_END();
    while(1)
    {
    }
}
- Make sure the project still compiles, then add the files and push to the GitHub repo.
Running a unity project
Now that unity has been added to your project, it is time to run the workflow. In BeetleboxCI, go back to the avr-ci-tutorial and run the pipeline. If everything passes correctly, you should see this screen:
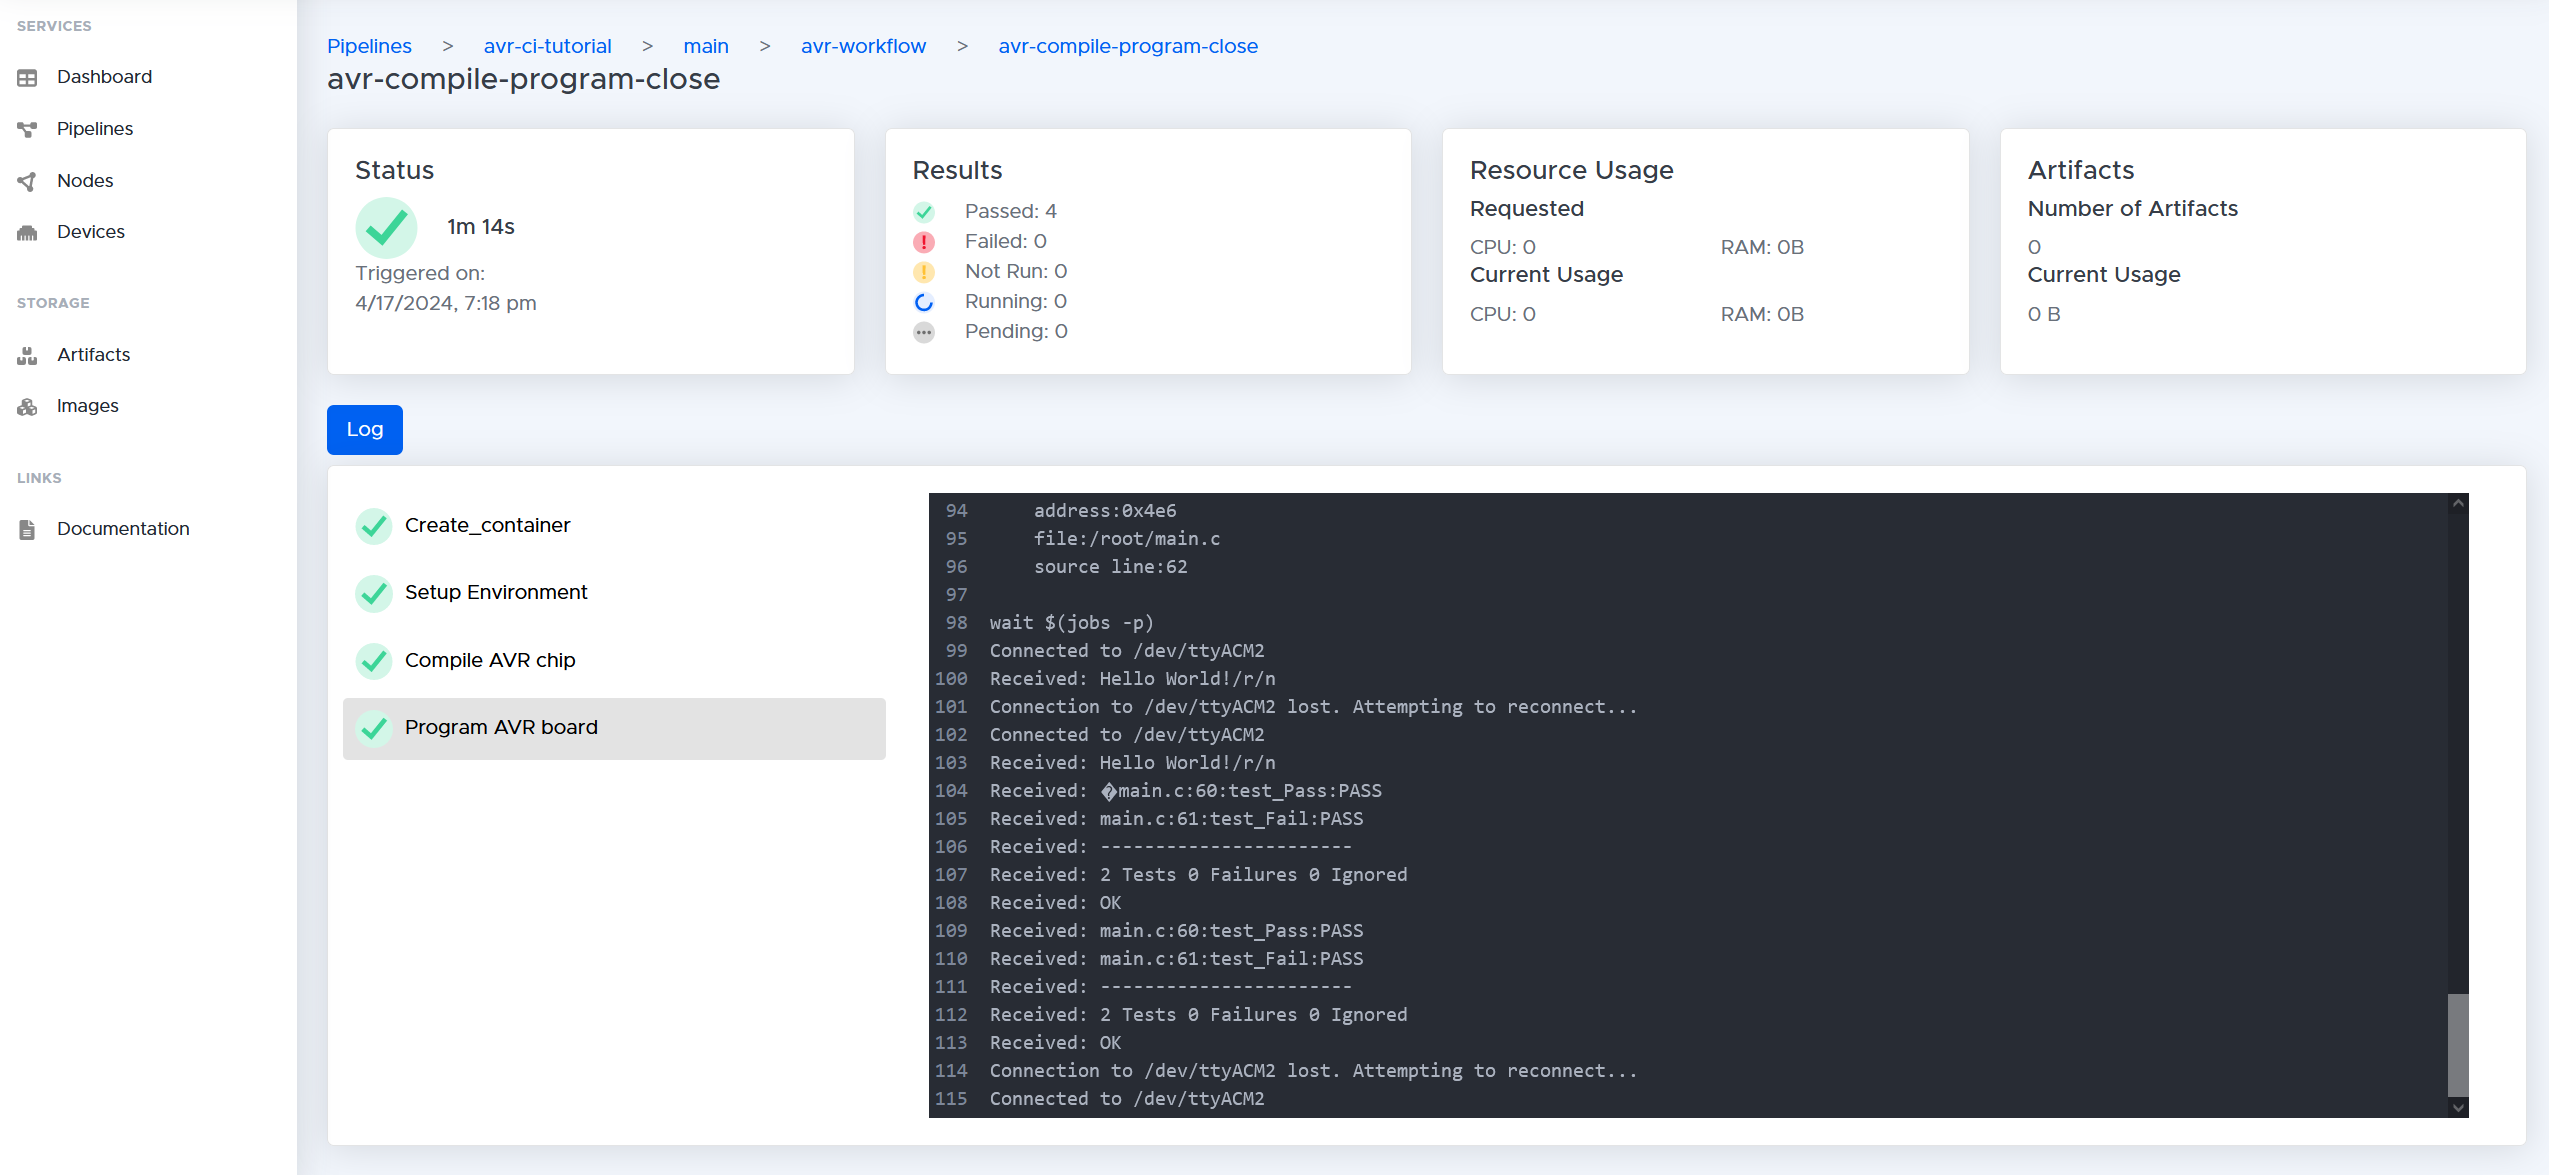 Notice how the output has now changed to a standard test:
Connection to /dev/ttyACM2 lost. Attempting to reconnect...
Connected to /dev/ttyACM2
Received: Hello World!/r/n
Received: �main.c:60:test_Pass:PASS
Received: main.c:61:test_Fail:PASS
Received: -----------------------
Received: 2 Tests 0 Failures 0 Ignored
Received: OK
Received: main.c:60:test_Pass:PASS
Received: main.c:61:test_Fail:PASS
Received: -----------------------
Received: 2 Tests 0 Failures 0 Ignored
Received: OK
Connection to /dev/ttyACM2 lost. Attempting to reconnect...
Connected to /dev/ttyACM2
Examining the main.c file, you will notice that you do indeed run two unit tests test_Pass and test_Fail.
    UNITY_BEGIN();
    RUN_TEST(test_Pass);
    RUN_TEST(test_Fail);
    UNITY_END();
test_Pass tests to see if a condition is true. The current condition is simply 1, which evaluates to true so this test passes.
void test_Pass(void)
{
    TEST_ASSERT_TRUE(1);
}
test_Fail on the other hand sees if a condition is false. The current condition is 0, which evaluates to false so this test passes.
void test_Fail(void)
{
    TEST_ASSERT_FALSE(0);
}
Once these tests run unity generates a report that it then prints over UART, which is then captured by BeetleboxCI. Of course, unity is able to be used for more sophisticated tests than this, which you can check out in the documentation.
Note that in general unity is not recommended to run on the hardware itself. Instead it should be used with simulators. It is recommended to run system tests on hardware itself, which is supported as well by BeetleboxCI. Unity is used here as a way of demonstrating what is possible with good reporting and for you to get inspired with your own system level tests.
Parse the generated report
At the moment a job is considered successful when a report is correctly recieved from the UART. This is great from a setting up point of view, but not very useful for checking if an error occured during testing. What should happen is that the report should be checked and if one of the tests fail, BeetleboxCI should raise an error.
To do this, you should look back at how unity reports an error:
Received: OK
Received: main.c:60:test_Pass:PASS
Received: main.c:61:test_Fail:PASS
Received: -----------------------
Received: 2 Tests 0 Failures 0 Ignored
You can see that the easiest way to tell if there is a failure is to extract N Failures and if N is greater than zero then a failure has occured.
Writing the parsing file
- Add the file
ParseOutput.pyto the project directory. Copy in the following code, add it to git and push it to your GitHub repo:
import re
import sys

def parse_text_file(file_path):
    try:
        with open(file_path, 'r', encoding="utf-8") as file:
            for line in file:
                # Use regular expression to find the pattern 'N Failures'
                matches = re.findall(r'\b\d+ Failures\b', line)
                for match in matches:
                    failures_count = int(match.split()[0])
                    if failures_count == 0:
                        print("Success! No failures detected.")
                    else:
                        print(f"Error! {failures_count} failures detected.")
                        return False
        return True
    except FileNotFoundError:
        print(f"Error: File '{file_path}' not found.")
        return False

# Example usage:
if __name__ == "__main__":
    file_path = sys.argv[1] # Replace with your file path
    result = parse_text_file(file_path)
    if result:
        print("File parsed successfully.")
    else:
        raise Exception("Error encountered during file parsing.")
- Edit it so that the result of
MonitorOutput.pyis piped toAVROutput.txt. This will create a fileAVROutput.txtthat will contain the the test report. Make sure to fill in your installation directory.
    - run:
        name: Program AVR board
        command: |
          python3 ./MonitorOutput.py > AVROutput.txt &
          mdb='<your_mplabx_installation-directory>/mplabx/<your_mplabx_version-number>/mplab_platform/bin/mdb.sh'
          $mdb mdb-avr-example.txt
          wait $(jobs -p)
- Add the following step after
Program AVR board. This step will read out theAVROutput.txttext file into your log and also parse it with your python script.
    - run:
        name: Parse Output Files
        command: |
          cat AVROutput.txt
          python3 ./ParseOutput.py AVROutput.txt
- Run the job. Once it has finished go to the job page and if everything has been successfull, you should see the following:

cat AVROutput.txt
Connected to /dev/ttyACM2
Received: main.c:60:test_Pass:PASS
Received: main.c:61:test_Fail:PASS
Received: -----------------------
Received: 2 Tests 0 Failures 0 Ignored
Received: OK
Connection to /dev/ttyACM2 lost. Attempting to reconnect...
Connected to /dev/ttyACM2
Received: main.c:60:test_Pass:PASS
Received: main.c:61:test_Fail:PASS
Received: -----------------------
Received: 2 Tests 0 Failures 0 Ignored
Received: OK
Received: �main.c:60:test_Pass:PASS
Received: main.c:61:test_Fail:PASS
Received: -----------------------
Received: 2 Tests 0 Failures 0 Ignored
Received: OK
Received: main.c:60:test_Pass:PASS
Received: main.c:61:test_Fail:PASS
Received: -----------------------
Received: 2 Tests 0 Failures 0 Ignored
Received: OK
Connection to /dev/ttyACM2 lost. Attempting to reconnect...
Connected to /dev/ttyACM2
python3 ./ParseOutput.py AVROutput.txt
Success! No failures detected.
Success! No failures detected.
Success! No failures detected.
Success! No failures detected.
File parsed successfully.
Challenge: Failing a test
You have seen an example of where the report indicates that no failures have occured, but you also need to make sure that BeetleboxCI can successfully pick up errors. Change your main.c file to deliberately fail a test and see if BeetleboxCI will alert you to the error.
Conclusion
Congratulations, you have reached the end of this tutorial on getting started with AVR microcontrollers. In this series you have learned:
- How to create a MPLAB project and link it to a git repo.
- How to enable UART on a Curiosity Nano board and use it to print simple statements.
- How to link that git repo with BeetleboxCI.
- How to compile for AVR microcontrollers on BeetleboxCI.
- How to remotely program the microcontoller through BeetleboxCI.
- How to monitor the microcontoller and pick up the output.
- How to use the unity framework system and print the results.
- How to parse reports to detect failures.
From here you can begin automating your own tests through the BeetleboxCI documentation or you can check out more of the getting started series if you are interested in using different sorts of boards.