AVR Microcontrollers: Part 1 Setting up MPLAB and git
Introduction
In this first part of the tutorial series, you will be setting up the CI Environment. You will learn how to configure BeetleboxCI to use MPLAB and integrate with GitHub.
You can find the source code for this example here.
Prerequisites
- Get BeetleboxCI for free here!This tutorial will be refering to the machine that BeetleboxCI is installed on as a server, but BeetleboxCI can easily run on just a laptop.
- Download and install MPLAB.
- A Git Repository provider. You will use GitHub for this tutorial. BeetleboxCI does support a range of different Git Repository providers, which you can find here.
- Make sure that the Git Repo provider is linked to your BeetleboxCI account
- Make sure to have Git installed on your computer as well.
- An AVR Microcontroller. For this you will be using the AVR64EA48 Curiosity Nano Evaluation Kit. However, other boards will also work with this tutorial. Make sure to swap out your board name at the relevant sections in the tutorial.
Setting up MPLAB and git
Creating a new MPLAB project
- First, plug in your AVR microcontroller via USB to the machine that is currently running BeetleboxCI.
- In the MPLAB IDE, create a new project. Choose
Microchip Embeddedin categories andApplications Project(s)as the projects. Click next. - In the
Select Devicescreen, MPLAB should have theAVR64EA48device listed in theDevicesection. ForToolselectAVR64EA48 Curiosity Nano. These values may vary if a different board is used. Click next. - In the
Select Compilerscreen, select one of the listed compilers. If there is not one installed, please visit the MPLAB website to install one. Click next. - In the
Select Project Name and Folderscreen provide theProject NameasAVRCIExample. ClickFinishto create the project.
Setting up the UART
One of the most important aspects of debugging is making sure your boards are able to provide debug information. To do this, you are going to enable UART so that you can print out logs to your server via a serial/CDC connection.
- Once the project has finished, click
MCC Content Manageron the toolbar and ensure all the files for your board are downloaded. - On your
Kit Windowtab, you will need to open the schematic of the board namedAVR64EA48 Curiosity Nano Schematics. Check where the serial/CDC port is connected to. TheUSART1 TXshould be connected toPC0andUSART1 RXshould be connected toPC1. If you are using a different board, these values will vary. - Click
MPLAB Code Configuration. This will open a different view. On the left hand side there should be a tab forDevice Resources. UnderDriversfindUARTand expand it. Click the green button which should add the UART to yourBuildertab. - On the right you should also see the
UART(None)tab. In theDependency SelectorfindUART PLIB Selectorand choseUART1. This will openConfiguration Settings. Ensure thatRedirect Printf to UARTis set to on. If you are using a different board you will need to choose the USART number that corresponds to the schematics.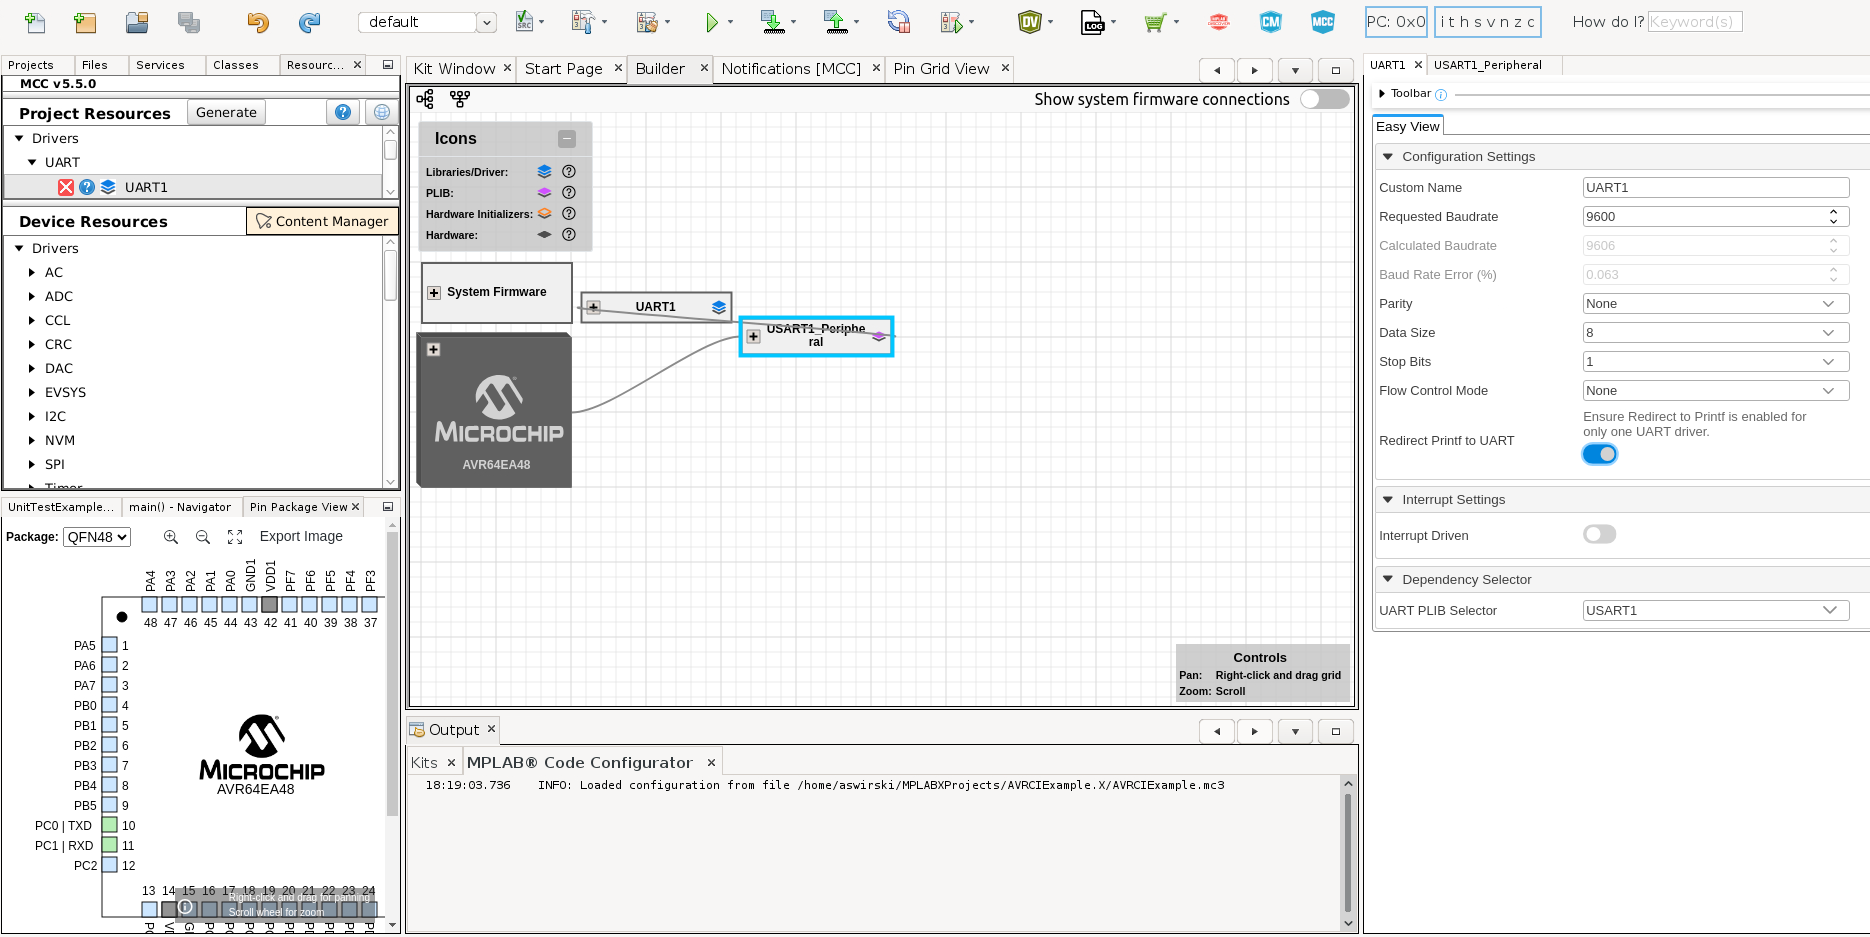
- In the
Pin Grid View, ensure that the relevant pinsPC1andPC0have been acquired according to your schematics. If you are using a different board these pins may vary.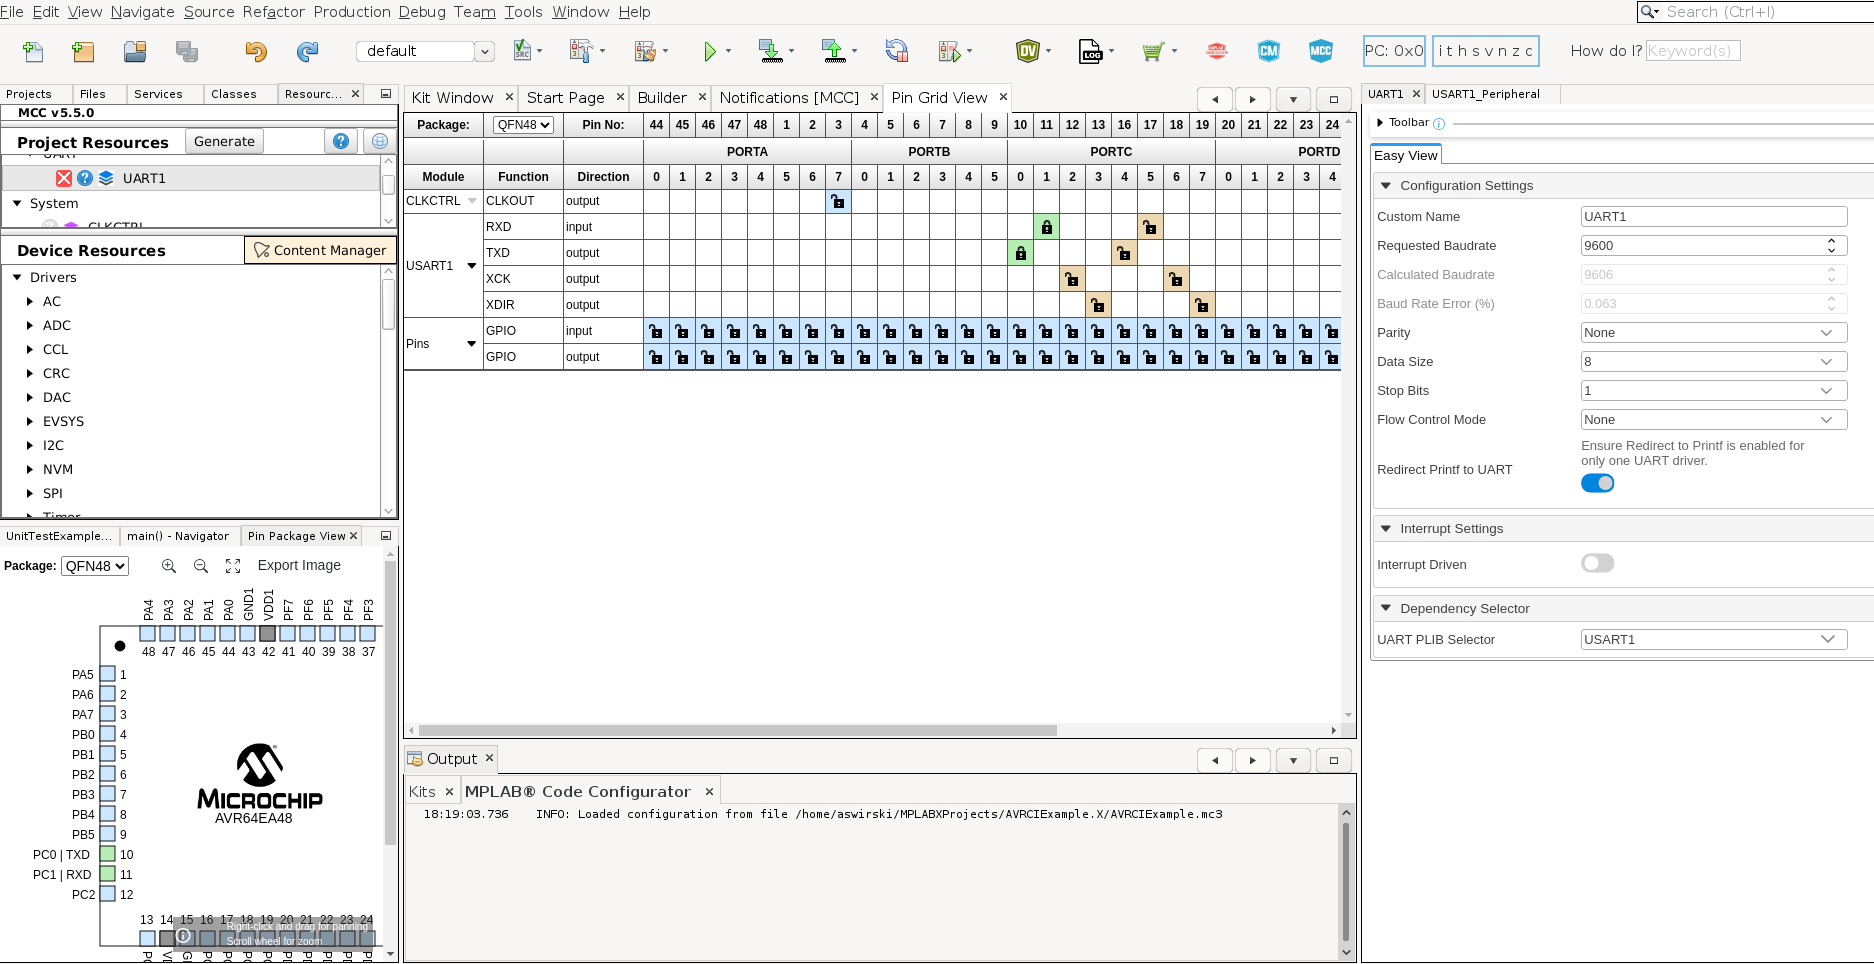
- Once that is all setup, you can then click the generate button under the
Project Resourcestab. This will generate all the relevant setup you need to be able to print data out through the UART port.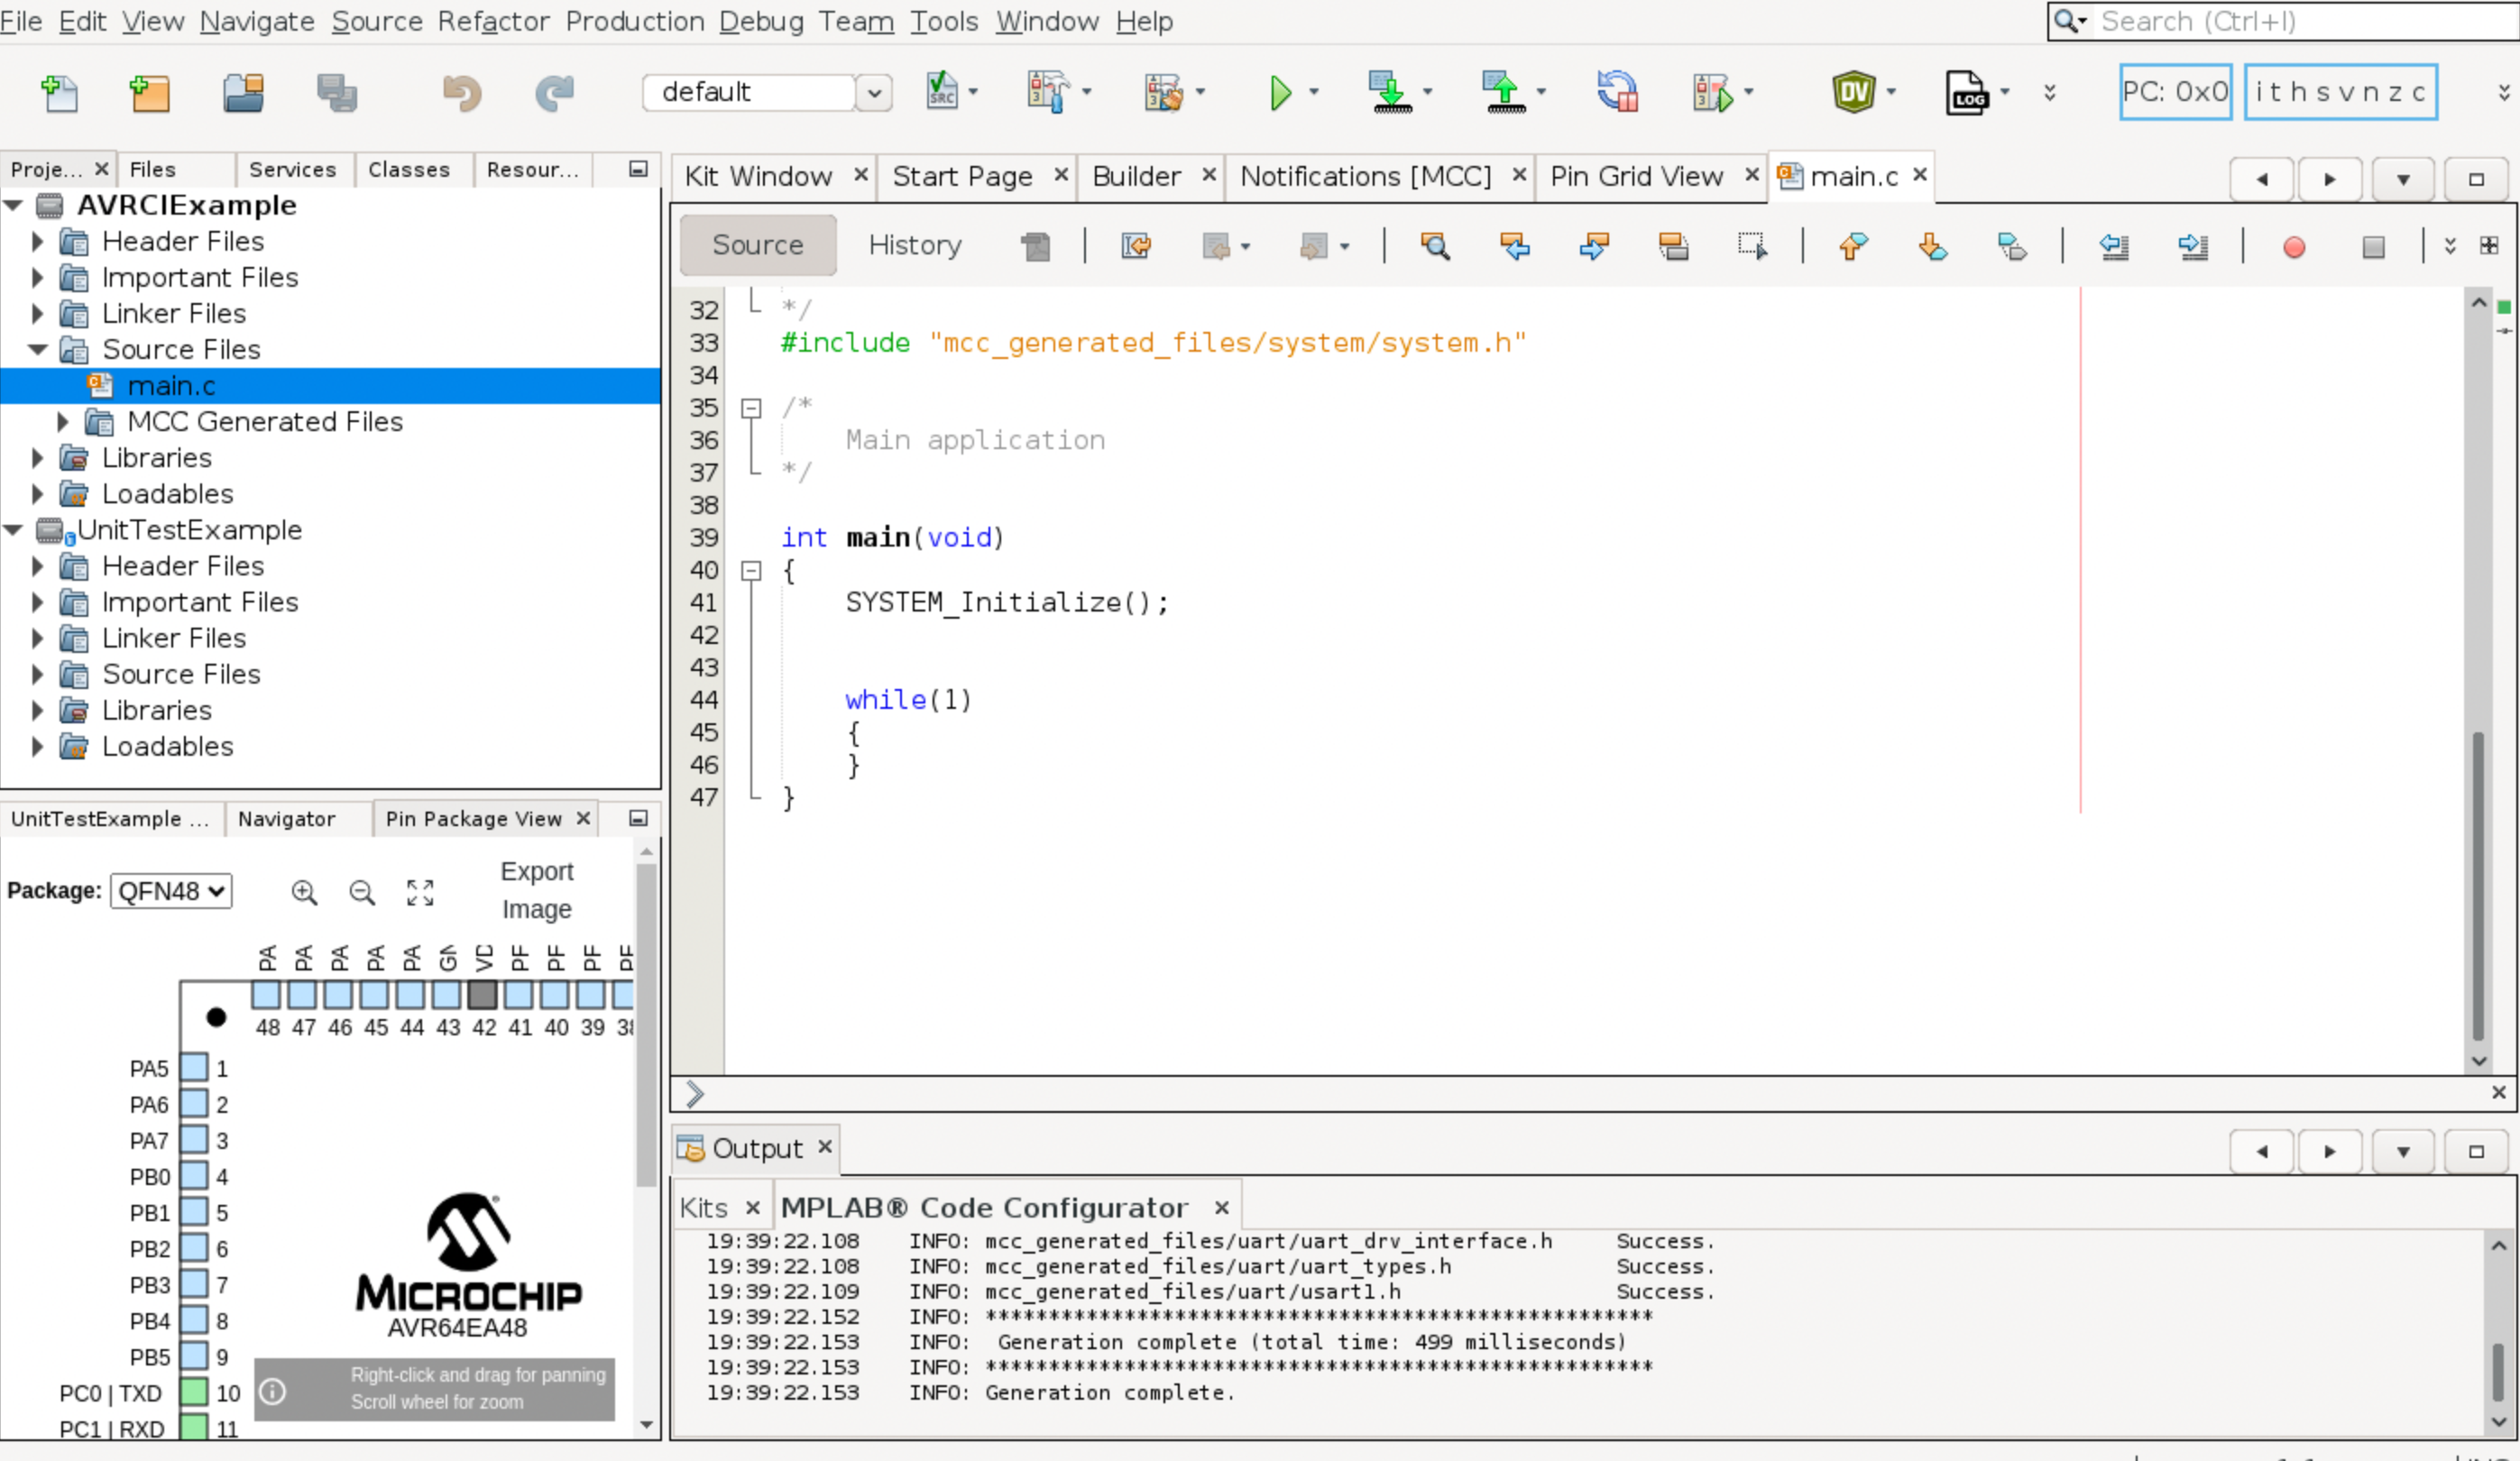
- Click on the
Filestab on the upper left hand corner and under theSource Filestab and make sure you seemain.cand aMCC Generated Filesfolder. This means that your system has generated and you will be editingmain.clater on. Build the project and ensure it is successful. Clean the project afterwards.
Setting up the Git Repository
Now you have your project, it is time to initialize the git repository and save it to GitHub. For every project, it is recommended setting up the git repo from the very beginning to make it easier to track changes and share your project.
You can setup a git repository in two ways. You can either use MPLAB X in built version control or you can use the git command line interface. In this tutorial you will be using the command line interface.
For this tutorial, you will be using GitHub, but BeetleboxCI supports a variety of Git Repo providers that you may wish to use instead.
- First, create a new repository in GitHub, call it
avr-ci-tutorialand make sure to leave it empty (don't add a readme). Here is a guide from GitHub. You should see the following screen: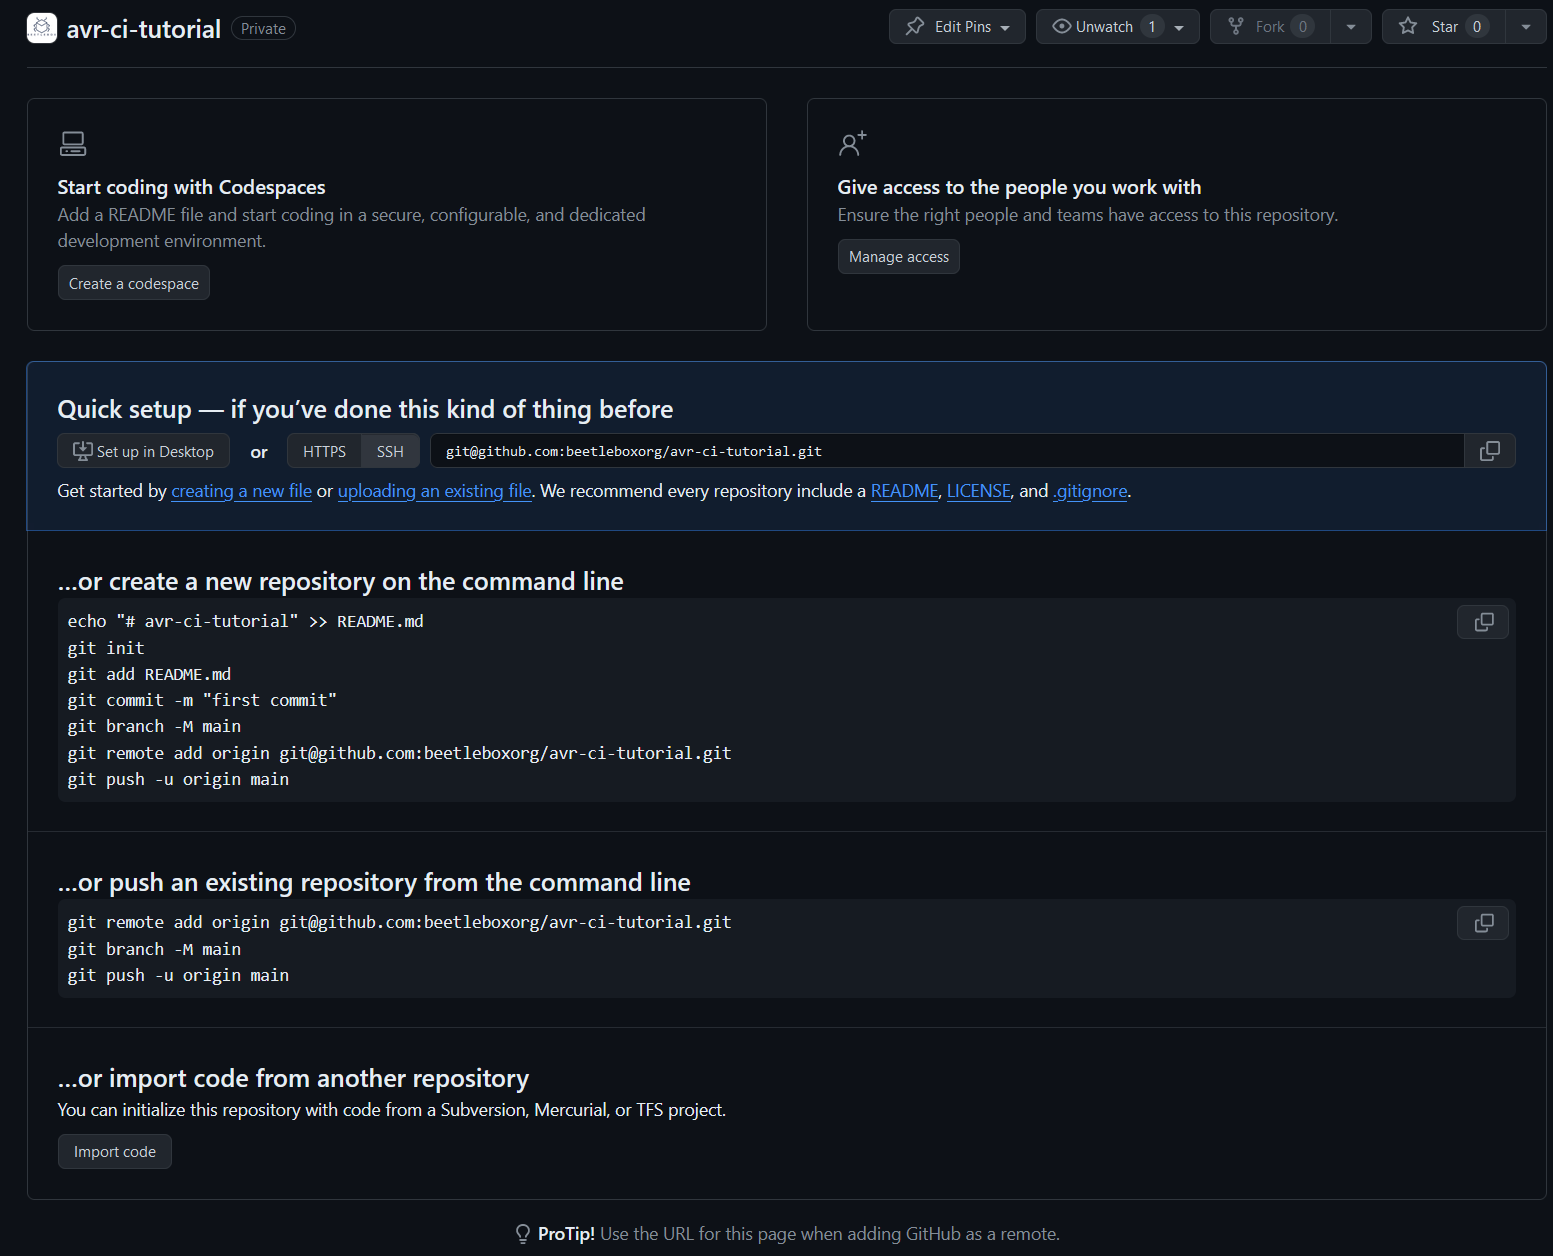
- You are going to follow the
…or create a new repository on the command linesection using your project. Launch a terminal in the directory of your project and run the following commands:
git init
git add .
git commit -m "first commit for avr microcontroller"
git branch -M main
git remote add origin git@github.com:<your_account_name>/avr-ci-tutorial.git
git push -u origin main
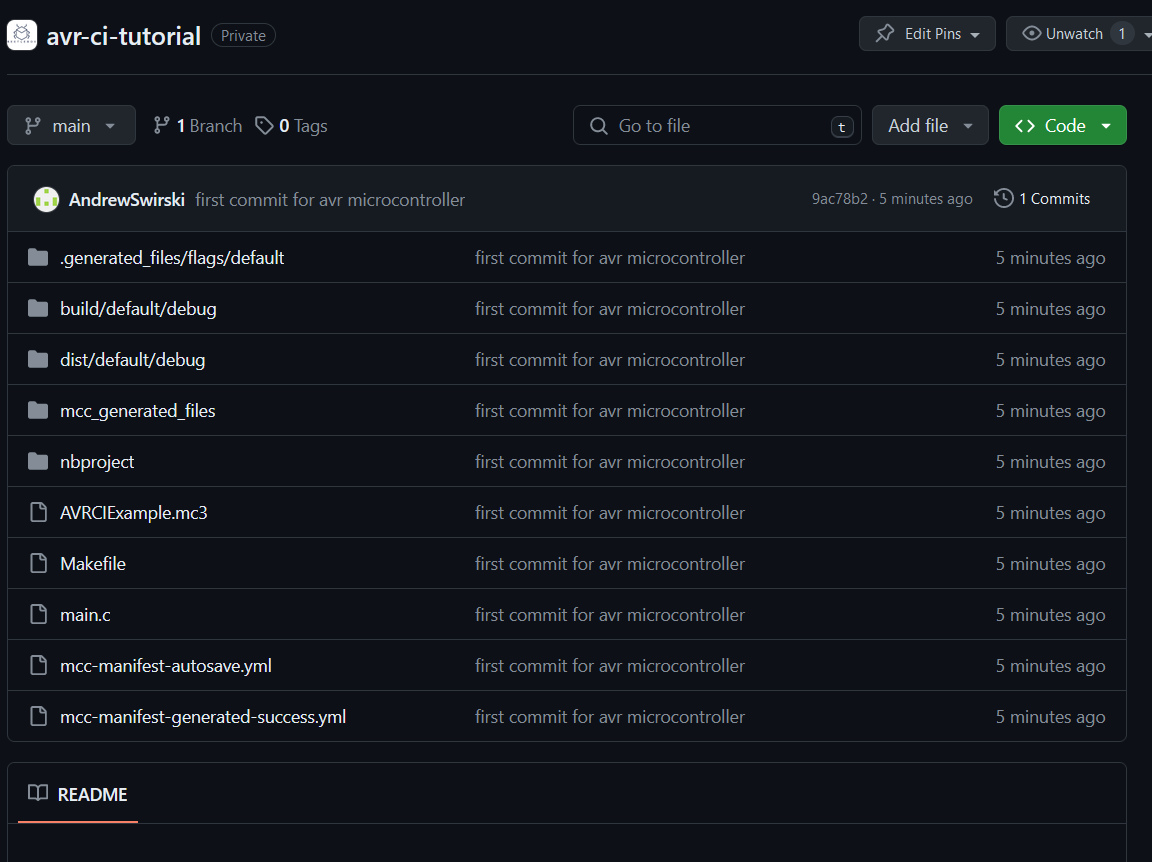
- In GitHub, you should see your files added to your repo. You may notice that you have some unwanted build files in there, if you did not clean the project prior to pushing. If you wish to, you can remove these by cleaning your project and pushing to the repo again. Then you can add the following .gitignore file to the project to stop it being added. Then push those changes once again to the repo.
Linking the Git Repository
Now you have your Git repo ready, you can link it to GitHub. For this step, if you not already done so, you will need to have your GitHub account link to BeetleboxCI.
- Open up BeetleboxCI on your web browser and click the
Pipelinespage. On this page, selectCreate Pipelineat the bottom. - On the
Create New Pipelinepage, search for your repo on theGitHubtab and selectCreate Pipeline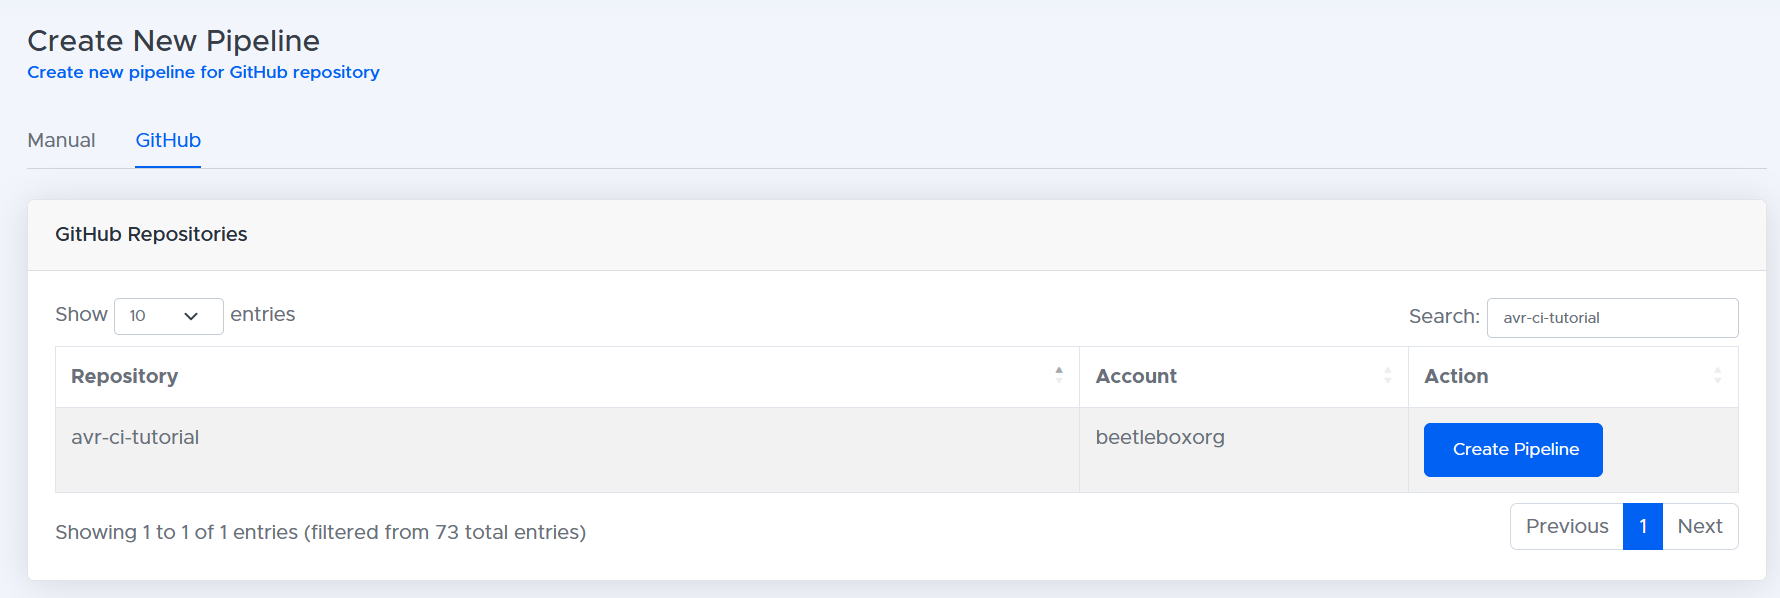
- You will be greeted by the
Set up pipeline config for avr-ci-tutorialpopup. Clickyesand then select themainbranch. This will create a.bbx/config.yamlfile in the branch. - You will then be met with the
Empty Config Filepopup. Selectnobecause you will be pasting in your own config file. - Copy the following pipeline into the blank config file. Make sure to subsitute in the values with your installation directory. Then click
Save and commit.
# Example config file to use as a starting point.
# Please visit https://docs.beetleboxci.com/docs/config/configuration-yaml for guidance on setting up your configuration file.

# Define a runner that will be used to run a job
runners:
 ubuntu-runner:
  image: public.ecr.aws/y2s4f3y9/ubuntu-generic:latest

# Define a job to be performed during a workflow
jobs:
 avr-compile-program-close:
  # Specify the runner used to perform this job
  privileged: True
  volumes:
   - mount:
      name: volume1
      path: <your_mplabx_installation-directory>/
  runner: ubuntu-runner
  steps:
    - run:
        name: Setup Environment
        command: |
          apt-get -y update
          apt-get install make
    - run:
        name: Compile AVR chip
        command: |
          export PATH=$PATH:<your_mplabx_installation-directory>/mplabx/<your_mplabx_version-number>/mplab_platform/bin
          make

# Define a workflow to orchestrate a job
workflows:
 avr-workflow:
  jobs:
   - avr-compile-program-close
Once committed you will be redirected to the pipeline page, you may be greeted by an error saying that no pipeline has been found. If this is the case then click the
refreshbutton that will reload the config file. You should now be greeted by the following pipeline:
Click the
Run Workflowplay button on the right hand side and clickYesto the warning. This will now launch your pipeline and should succeed with a green tick. You now have run your first AVR microcontroller pipeline.
Explaining your pipeline.
You have now successfully run a pipeline and this next section will explore how it works. Each pipeline consists of one or more workflows. You can think of a workflow as a single automated process from source code to deliverable code.
workflows:
 avr-workflow:
  jobs:
   - avr-compile-program-close
In this case, you have a single workflow called avr-workflow. Each workflow will then run one or more jobs. A job is a series of tasks that are to be run on a single independent execution environment known as a container. Every job will run independently and in parallel with one another until BeetleboxCI runs out of processing capacity. In the avr-workflow, you have a single job to run called avr-compile-program-close:
runners:
 ubuntu-runner:
  image: public.ecr.aws/y2s4f3y9/ubuntu-generic:latest

jobs:
 avr-compile-program-close:
  # Specify the runner used to perform this job
  ...
  runner: ubuntu-runner
  ...
In the jobs section, you can define the the type of container the job is going to execute in, which is known as a runner. You can define a runner in the runners section. Each runner must have an image and you can think of an image as a snapshot in time of a pre-built container. In this case, there is a single runner called ubuntu-runner and that runner is using the image public.ecr.aws/y2s4f3y9/ubuntu-generic:latest. This is a pre-built container that has a generic version of ubuntu linux attached. Once the runner is defined, you can then declare the steps that the job needs to run. In this case, the goal is to get the project to compile.
jobs:
 avr-compile-program-close:
  # Specify the runner used to perform this job
  privileged: True
  volumes:
   - mount:
      name: volume1
      path: <your_mplabx_installation-directory>/
  runner: ubuntu-runner
  steps:
    - run:
        name: Setup Environment
        command: |
          apt-get -y update
          apt-get install make
    - run:
        name: Compile AVR chip
        command: |
          export PATH=$PATH:<your_mplabx_installation-directory>/mplabx/<your_mplabx_version-number>/mplab_platform/bin
          make
To get the project to compile, you need to have access to MPLAB. To achieve this, the container is given elevated privileges to the host system through privileged: True. This will also allow the container to gain access to the USB of the host so that it can communicate over UART later in this tutorial. The volumes then mounts a directory from the host system and in this case you are mounting the directory containing MPLAB.
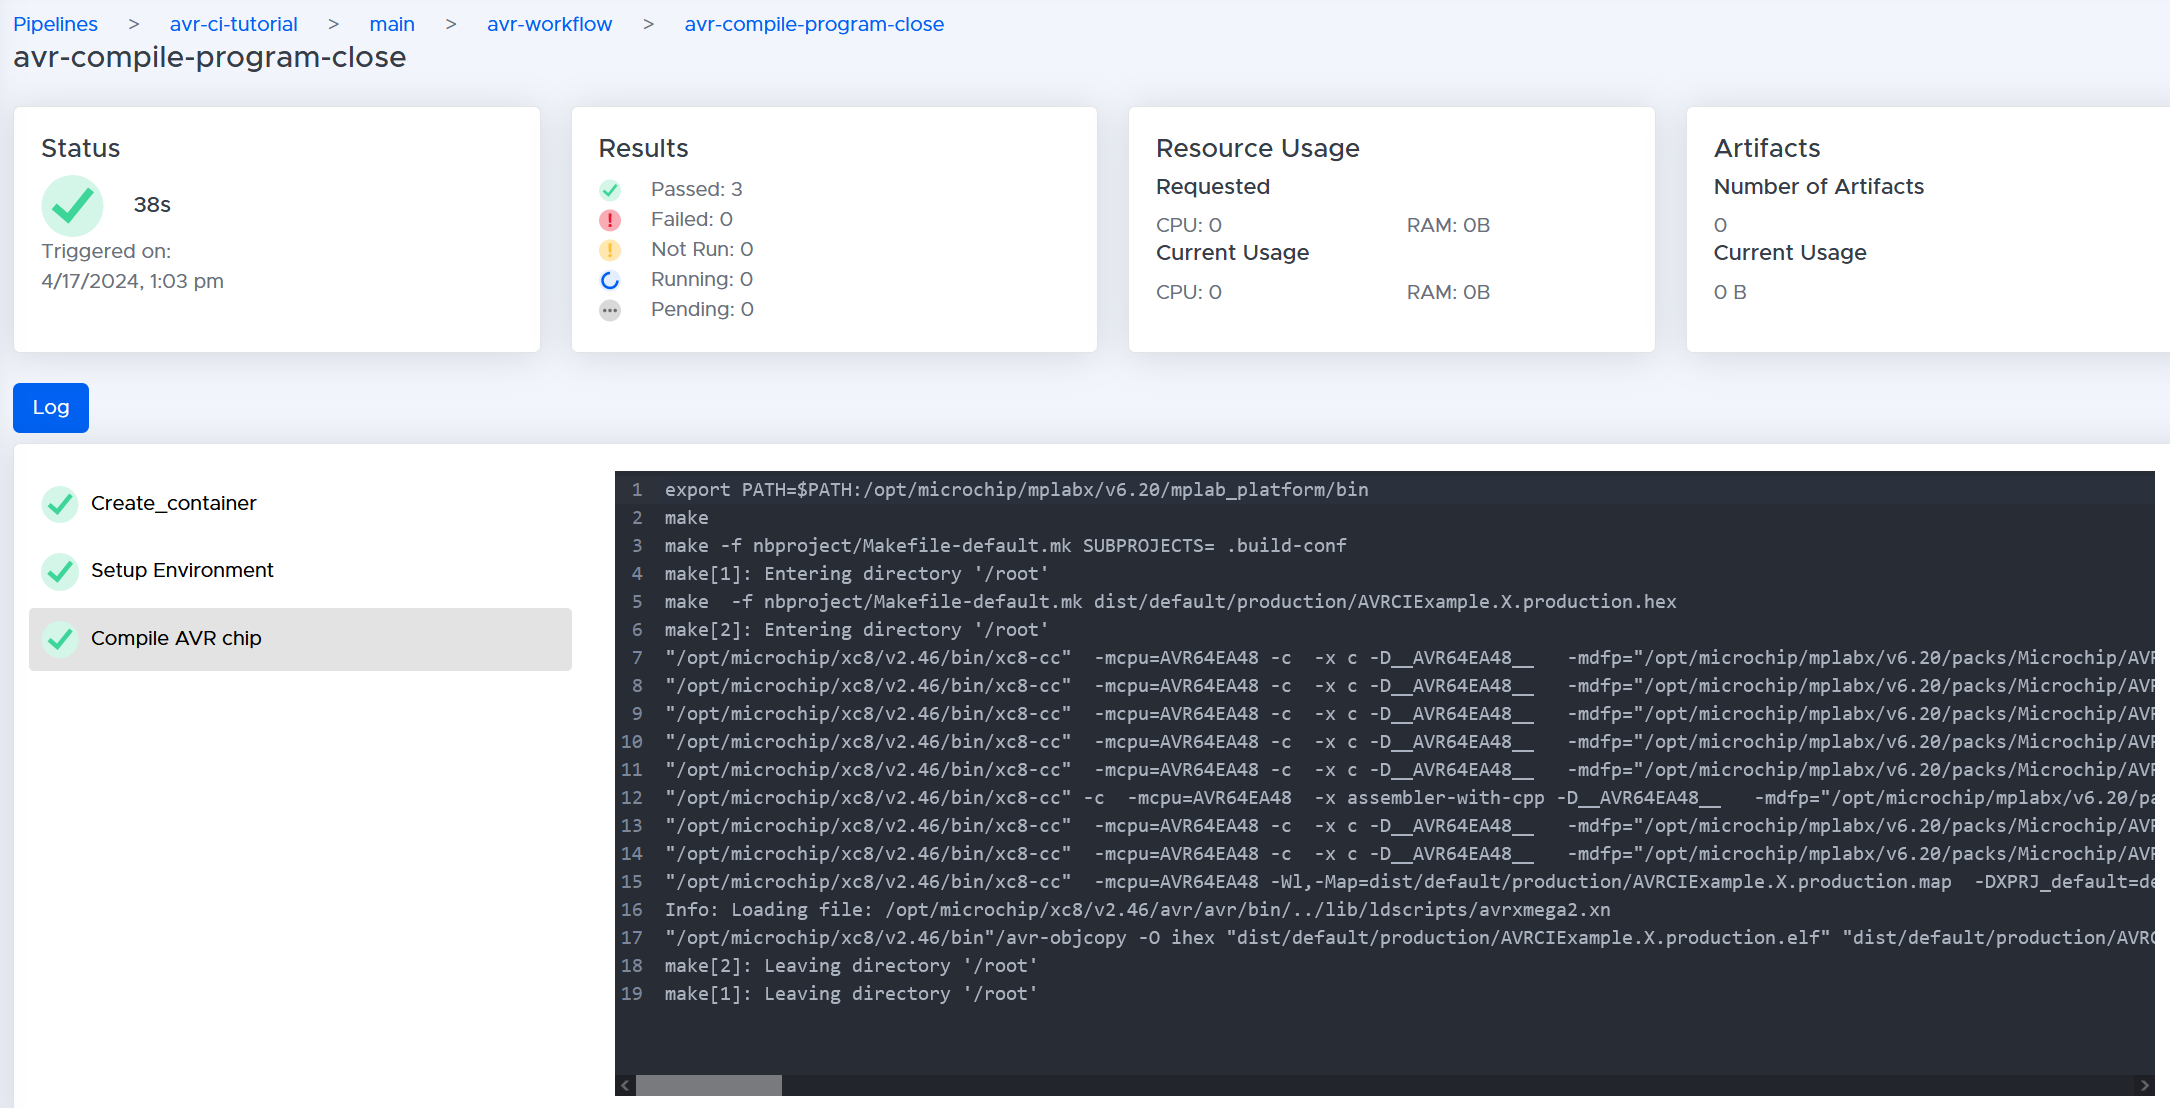
There are two steps in this job. Setup Environment updates the container and ensures that make is installed on the container. Compile AVR chip then adds MPLAB to the path of the container. In BeetleboxCI, the git repo is automatically pulled into the container at the beginning. Running make then invokes the makefile in the directory and builds your project.
If you navigate the pipeline in BeetleboxCI, you will be able to see both these steps and the runner's output:
Conclusion
In this section, you have:
- Created a new MPLAB project for an AVR microcontroller.
- Enabled UART on the device and allowed print to occur through it.
- Setup a git repositoy and pushed the project to it.
- Linked the repo with BeetleboxCI and run a simple make pipeline
In the next section, you will start monitoring the UART for output and run simple unit tests on device.