AVR Microcontrollers: Part 2 Monitoring the microcontroller
Introduction
In the last section, you set up the project in MPLABX, created a git repo and linked it to BeetleboxCI. Finally, you ran a compilation. In this section, you will explore:
- Programming the AVR microcontroller.
- Monitoring simple print statements from the AVR Microcontroller.
- Using BeetleboxCI's device feature.
You can find the source code for this example here.
Monitoring the microcontoller
Editing your MPLAB project
In this section, you are going to put a simple print statement in your MPLAB project.
- In the MPLAB IDE, edit
main.cas follows:
int main(void)
{
    SYSTEM_Initialize();
    printf("Hello World!/r/n");

    while(1)
    {
    }
}
- In a terminal open in the project directory, push the changes to GitHub:
git add .
git commit -m "Hello World Print statement"
git push
Adding the AVR Microcontroller as a device to BeetleboxCI
One problem that embedded engineers often face when setting up CI for devices is ensuring that a job does not overwrite a device that is already in use. BeetleboxCI has a specific feature to stop this problem occuring that is called devices. In essence, you can declare that a device is attached to BeetleboxCI and when multiple jobs target that device, BeetleboxCI will ensure that the jobs are orchestrated to not clash with one another.
- In BeetleboxCI, click
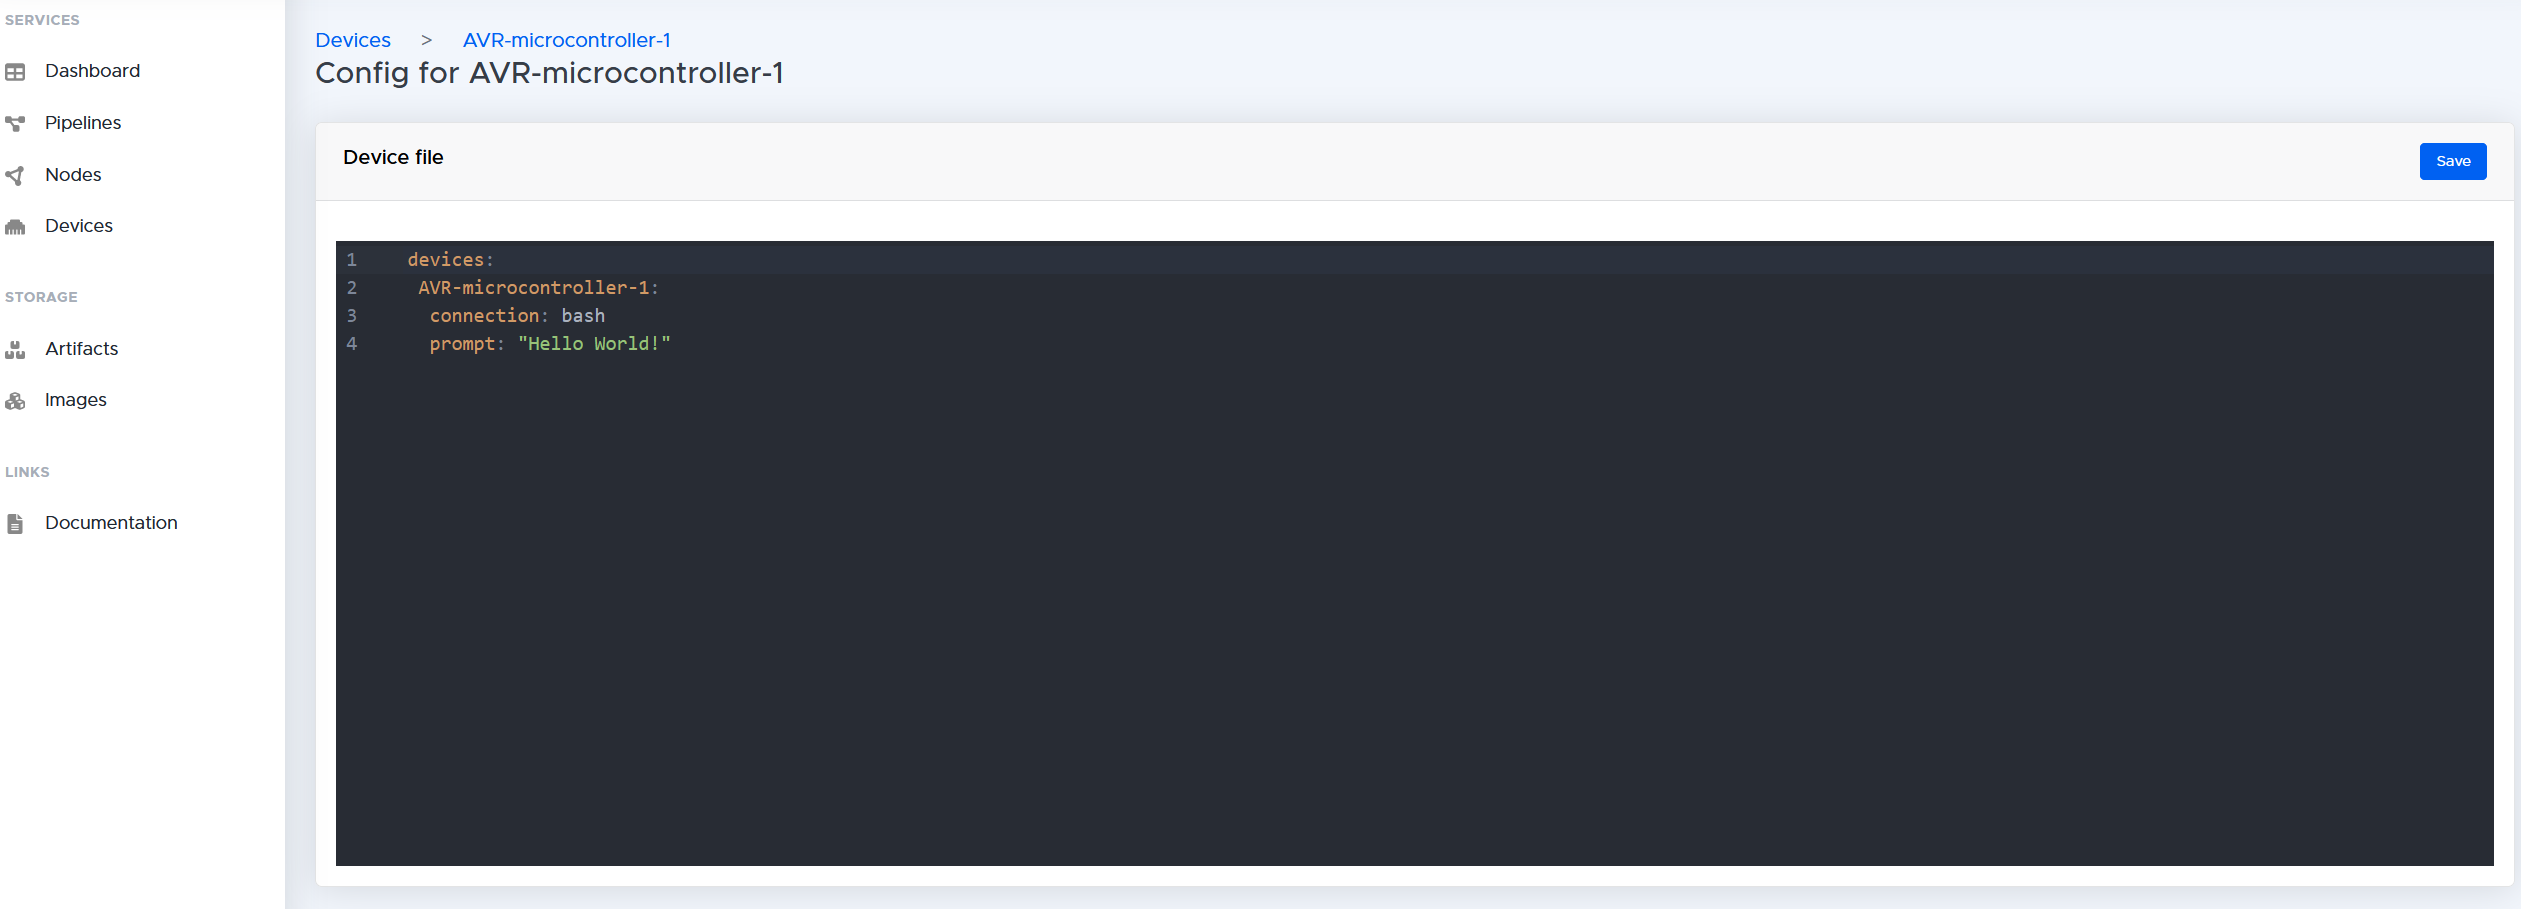
Devicesunder theServicespanel. Then click theRegister Devicebutton at the bottom. This will open a configuration file for a new device. Copy and paste the following into the file:
devices:
 AVR-microcontroller-1:
  connection: bash
  prompt: "Hello World!"
Then click the Save button.

- You can now link this device for the job you have created. To do this go back to the pipeline for
avr-ci-tutorialand click the cog button on the right hand side of the page to enter the pipeline editor. Add the linedevice: AVR-microcontroller-1to theavr-compile-program-closeso the file looks as shown:
jobs:
 avr-compile-program-close:
  # Specify the runner used to perform this job
  runner: ubuntu-runner
  privileged: True
  device: AVR-microcontroller-1
  ...
This will lock the device when the job is running so if another job attempts to use the AVR-microcontroller-1 it must wait until avr-compile-program-close finishes.
Programming the AVR Microcontroller
Now that the source code is ready, you need to compile it and then program the AVR microcontroller. To program the device, you are going to utilise the Microchip Debugger (MDB).
- You first need to create a script for the MDB to run. In the project directory, add a new file called
mdb-avr-example.txtand copy the following into the file:
Device AVR64EA48
set communication.interface updi

Hwtool
hwtool pkobnano

Program "./dist/default/production/AVRCIExample.X.production.elf"
Reset
run
wait 3000
halt
quit
Make sure to add and push this file into the git repo. The options for this script are specific to the AVR curiosity nano. If you are using another AVR microcontroller, you will need to modify device and set communication.interface updi to your specific board.
- In the pipeline editor add another step to the
avr-compile-program-closejob. Also editSetup Environmentstep to includeapt-get install libusb-1.0-0. Make sure to edit in the values specific to your setup:
...
    - run:
        name: Setup Environment
        command: |
          apt-get -y update
          apt-get install make
          apt-get install libusb-1.0-0
    - run:
        name: Compile AVR chip
        command: |
          export PATH=$PATH:<your_mplabx_installation-directory>/mplabx/<your_mplabx_version-number>/mplab_platform/bin
          make
    - run:
        name: Program AVR board
        command: |
          mdb='<your_mplabx_installation-directory>/mplabx/<your_mplabx_version-number>/mplab_platform/bin/mdb.sh'
          $mdb mdb-avr-example.txt
...
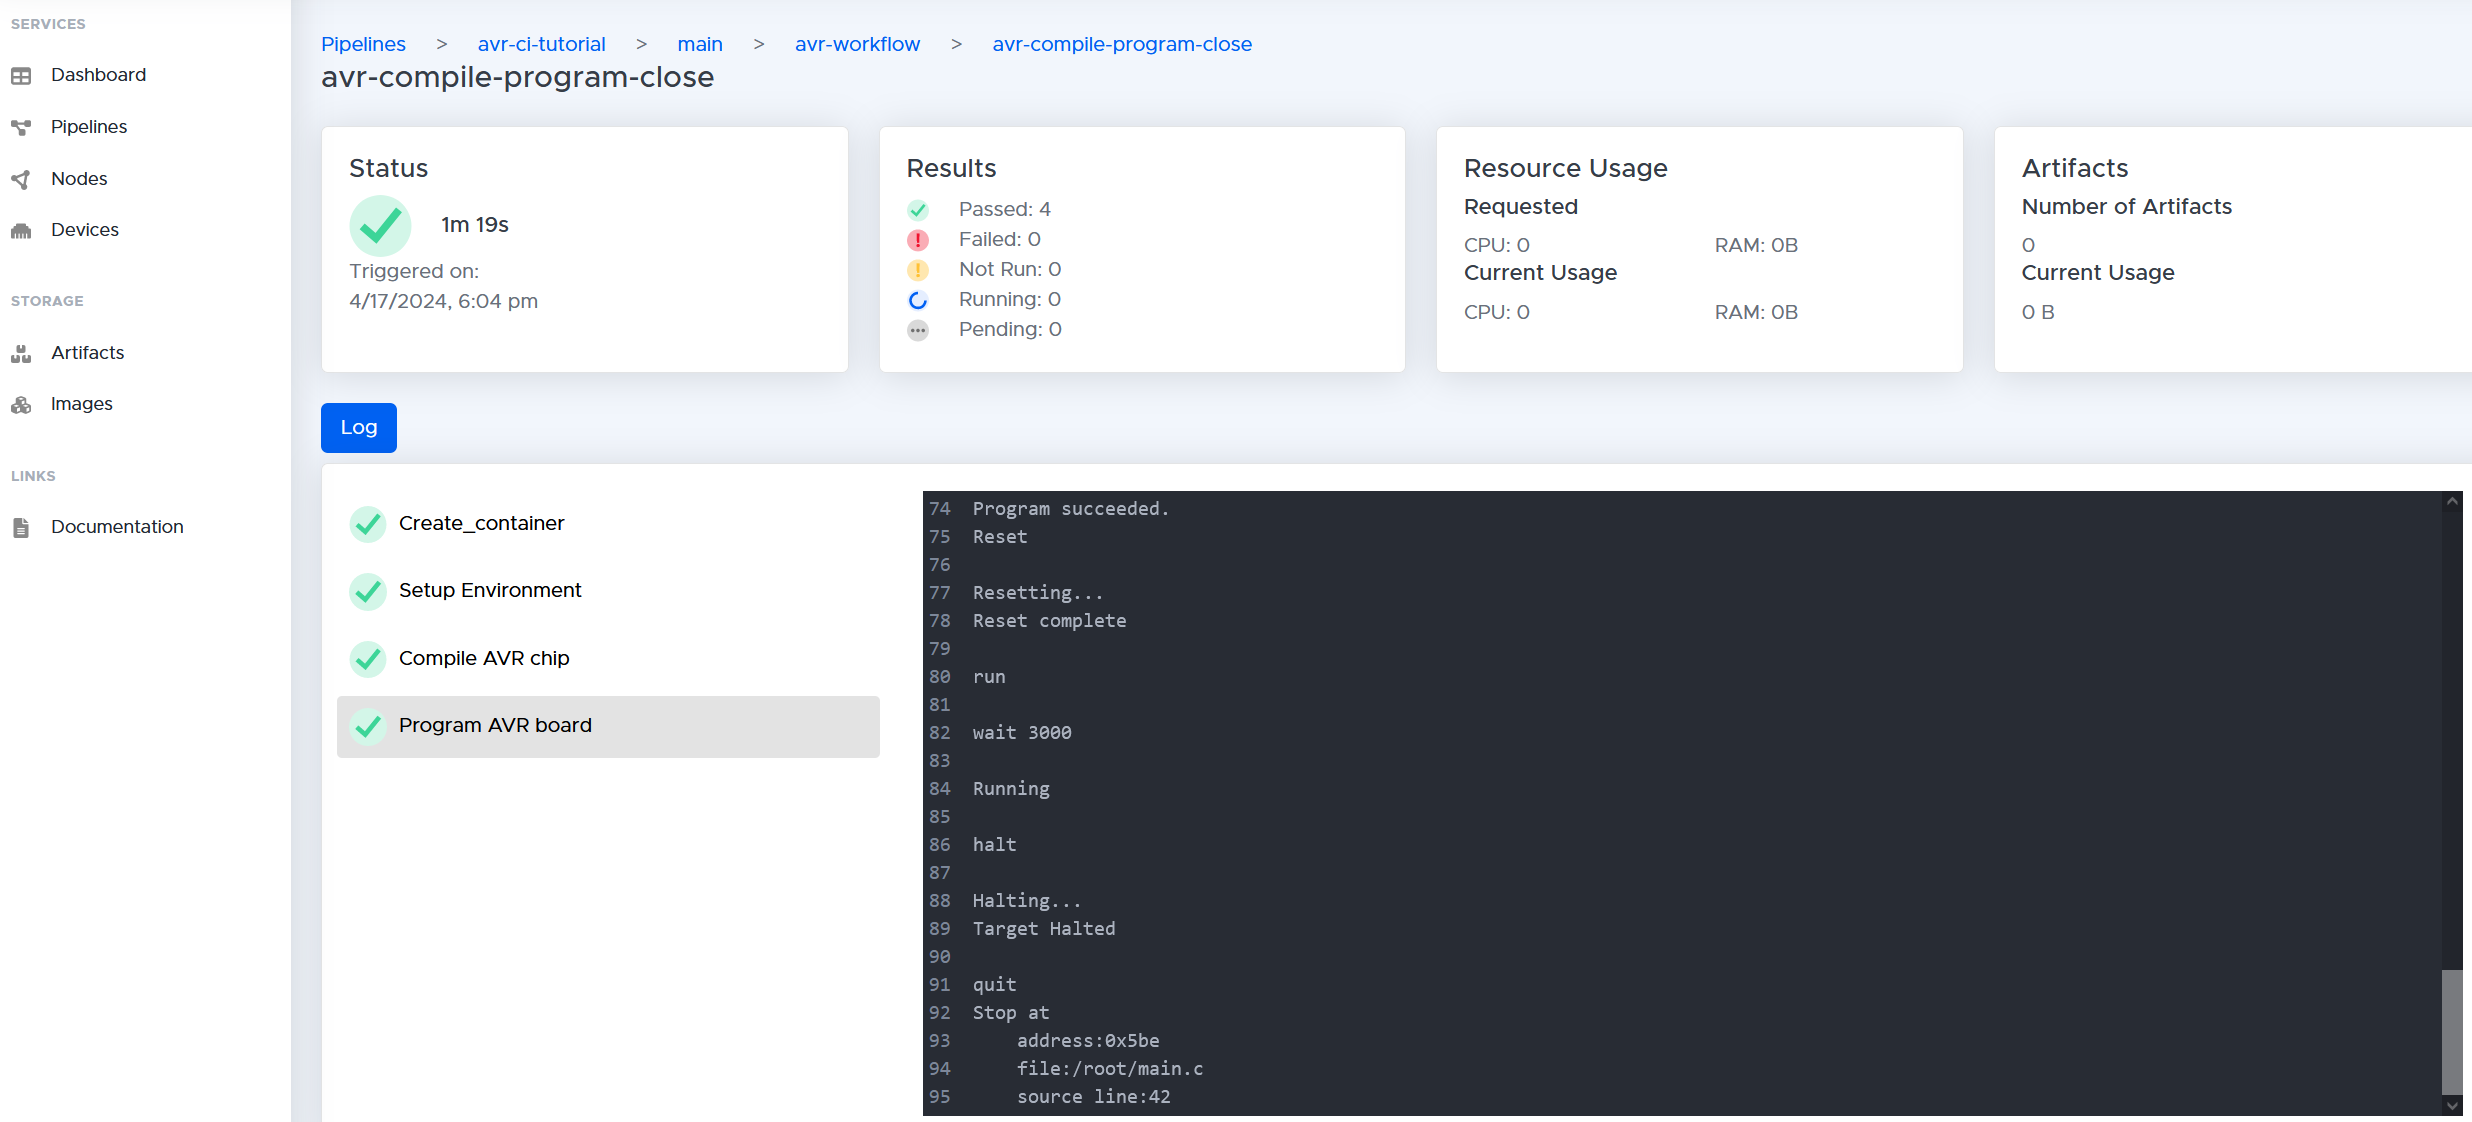
- Run the job. Once it has finished navigate to the
avr-compile-program-closejob page, which should show passing jobs:
Monitoring the AVR Microcontroller
You are now compiling and programming the microcontroller. The final step is to monitor the output from the UART connection. This can be a tricky step because the device is going to be constantly disconnecting and reconnecting from the USB as it is reprogrammed and then reset. To handle this you will use a special script that will monitor the USB port that the device is connected to for sixty seconds. If the signal breaks in those sixty seconds, then it will attempt to reconnect.
- Add the following file
MonitorOutput.pyto your MPLAB project directory. Change the USB port value to the USB port that your AVR microcontroller is attached to. Afterwards add this file and push to the git repo:
import serial
import time

def connect_to_device(port, baudrate=9600, timeout=1):
    try:
        ser = serial.Serial(port, baudrate=baudrate, timeout=timeout)
        print(f"Connected to {port}")
        return ser
    except serial.SerialException:
        print(f"Failed to connect to {port}. Retrying...")
        return None

def main(runtime):
    port = '<usb_port_of_avr_microcontroller>'  # Change this to the appropriate port of your USB device
    start_time = time.time()
    while time.time() - start_time < runtime:
        ser = connect_to_device(port)
        if ser is not None:
            try:
                while time.time() - start_time < runtime:
                    data = ser.readline().decode().strip()
                    if data:
                        print("Received:", data)
            except serial.SerialException:
                print(f"Connection to {port} lost. Attempting to reconnect...")
            finally:
                ser.close()
        time.sleep(1)  # Wait before attempting to reconnect

if __name__ == "__main__":
    runtime = 60  # Set the runtime in seconds
    main(runtime)
- In the pipeline editor, edit the steps to include the needed python packages and run this python file:
...
    - run:
        name: Setup Environment
        command: |
          apt-get -y update
          apt-get install make
          apt-get install libusb-1.0-0
          apt-get install python3.10  -y
          apt-get -y install python3-pip
          pip3 install pySerial
    - run:
        name: Compile AVR chip
        command: |
          export PATH=$PATH:<your_mplabx_installation-directory>/mplabx/<your_mplabx_version-number>/mplab_platform/bin
          make
    - run:
        name: Program AVR board
        command: |
          python3 ./MonitorOutput.py &
          mdb='<your_mplabx_installation-directory>/mplabx/<your_mplabx_version-number>/mplab_platform/bin/mdb.sh'
          $mdb mdb-avr-example.txt
          wait $(jobs -p)
...
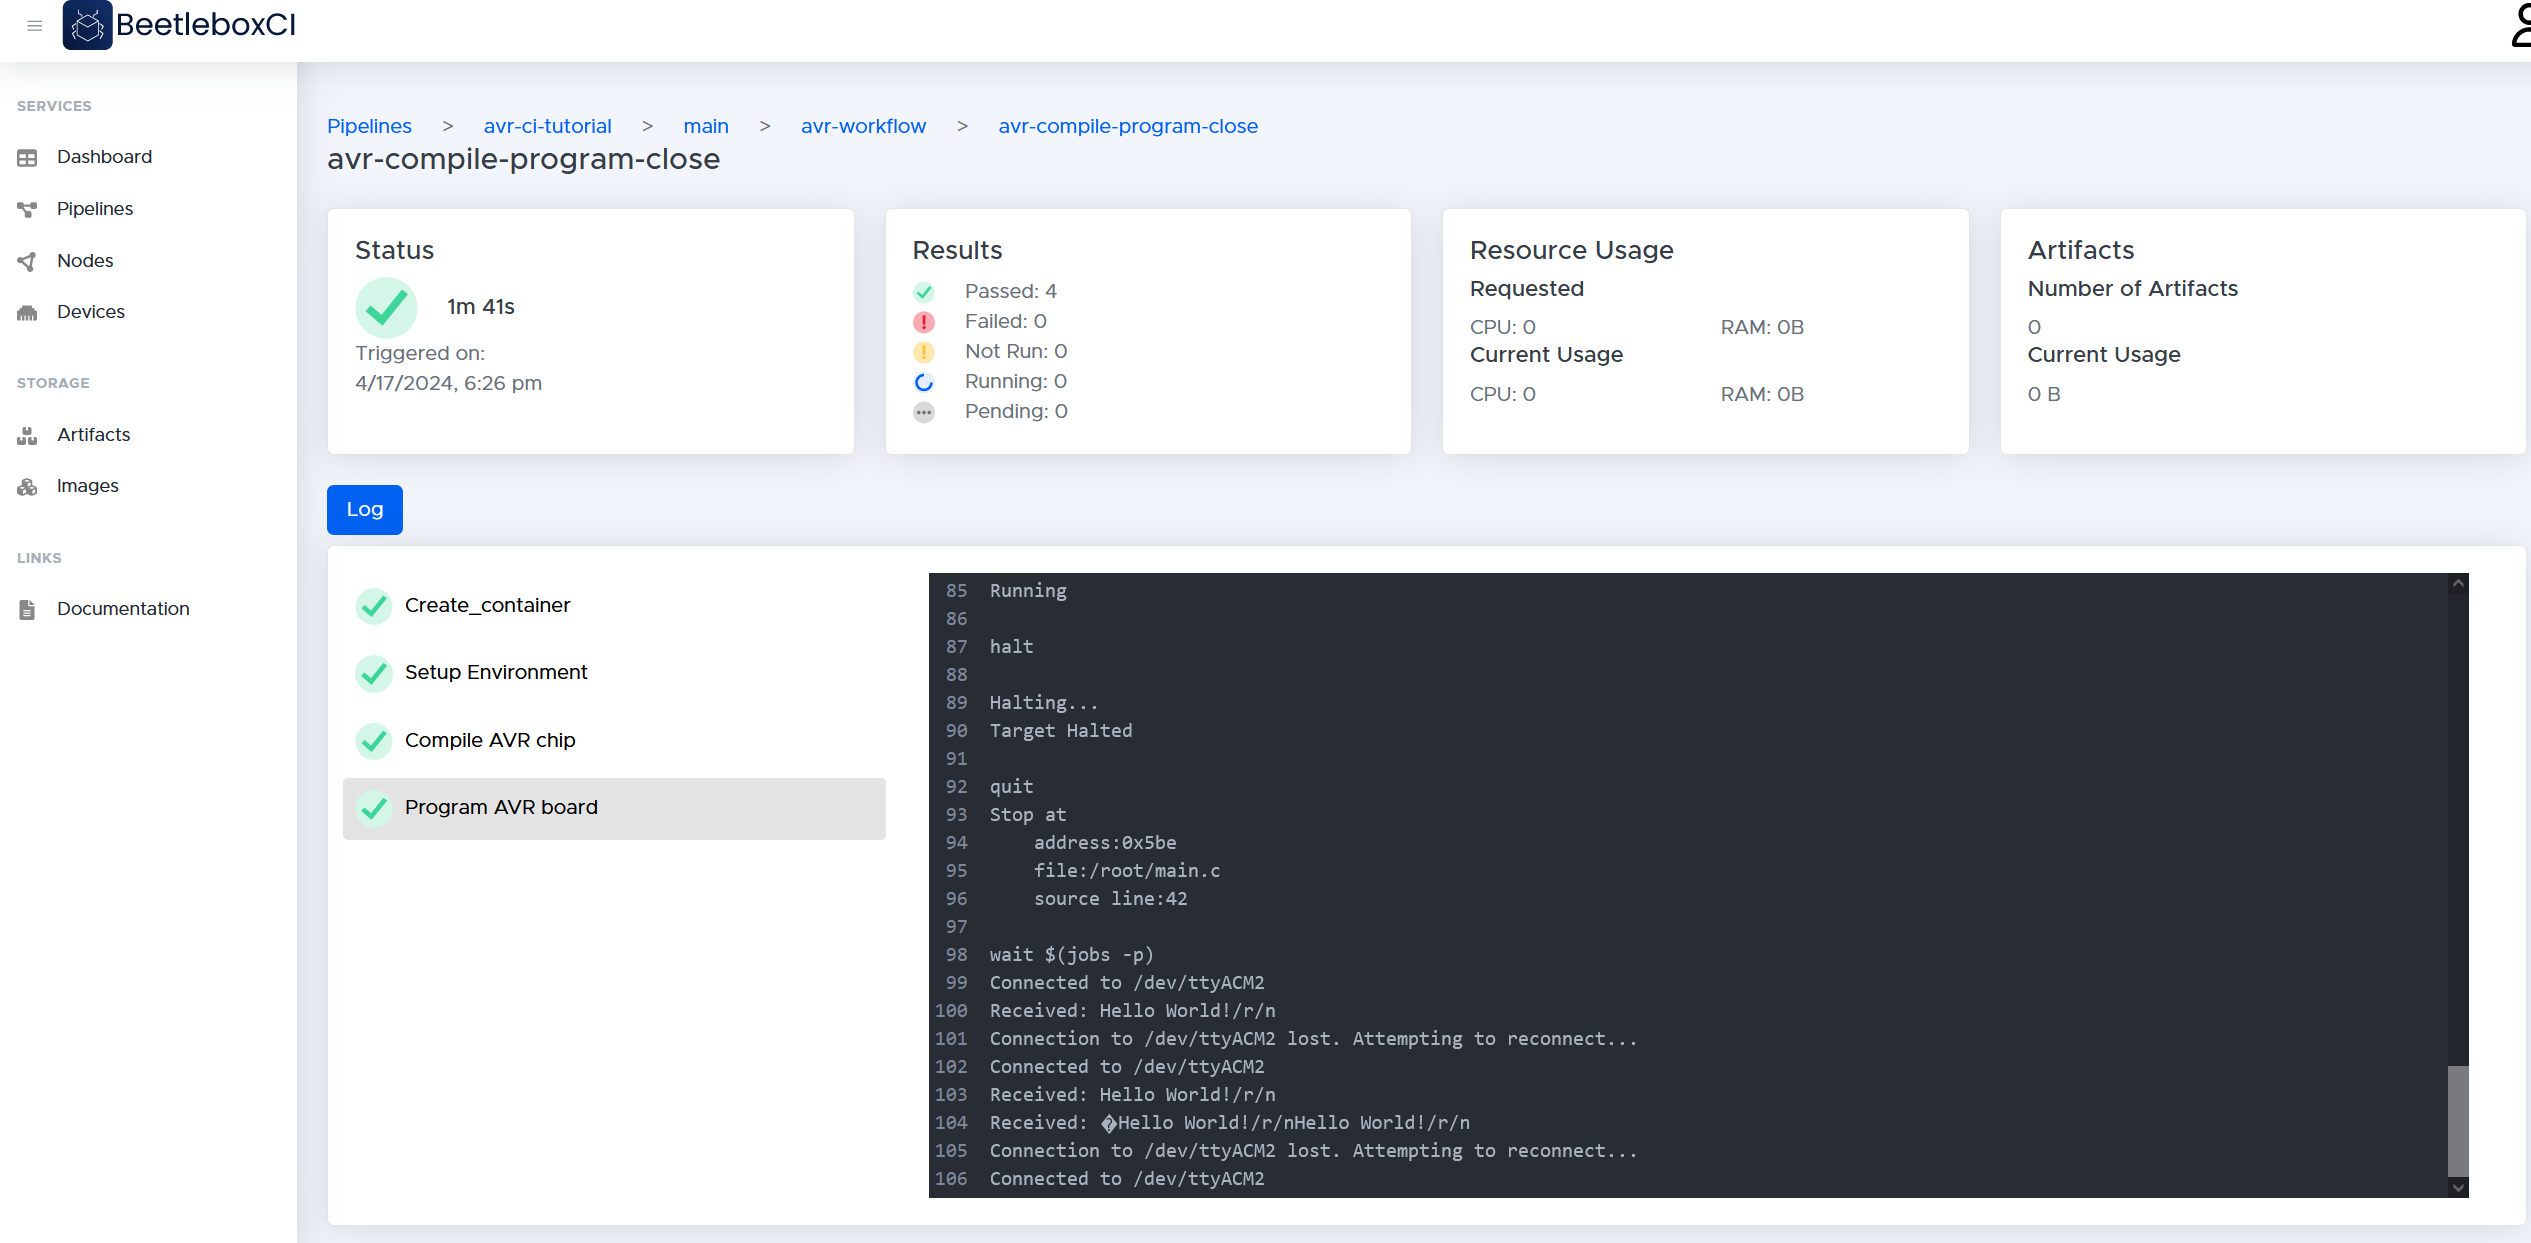
- Run the job. Once it has finished navigate to the
avr-compile-program-closejob page, which should show passing jobs:
 Notice also the output of the final step should read:
Connected to /dev/ttyACM2
Received: Hello World!/r/n
Connection to /dev/ttyACM2 lost. Attempting to reconnect...
Connected to /dev/ttyACM2
Received: Hello World!/r/n
Received: �Hello World!/r/nHello World!/r/n
Connection to /dev/ttyACM2 lost. Attempting to reconnect...
Connected to /dev/ttyACM2
This tells us that the device is writing to UART and that you are succesfully monitoring the device.
Conclusion
In this section, you have:
- Programmed the AVR microcontroller.
- Monitored simple print statements from the AVR Microcontroller.
- Used the BeetleboxCI's device feature to stop other jobs from clashing when the job is running. In the next section, you will look at a more powerful way of running reports and then parsing those reports with BeetleboxCI.